# Welcome to Tweed

Tweed bridges the gap between the complexity of the blockchain and mainstream users, through robust headless technology and a low-code SDK. Tweed products prioritize user experience without sacrificing security or user ownership.&#x20;

Your brand is placed at the center of Tweed's technology. Now you can focus on building unique and exciting experiences - and let Tweed take care of the rest.

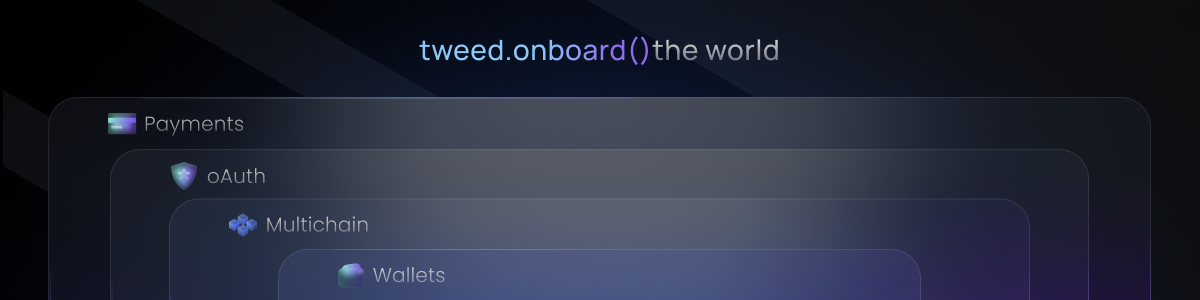
<figure><img src="https://2034179314-files.gitbook.io/~/files/v0/b/gitbook-x-prod.appspot.com/o/spaces%2FgQyCg5IN7Cv6AnUUpGl2%2Fuploads%2FCW2WbmsH3Nh6XyRsMb0p%2Fwelcome.png?alt=media&amp;token=ecfa9a3a-a3cc-4aa4-a0bb-d1d156bb92a2" alt="layers of tweed: payments, oauth, multi chain, wallets"><figcaption></figcaption></figure>

***

## 🎉 Benefits of Tweed 🎉

<table data-view="cards"><thead><tr><th></th><th></th><th data-hidden data-card-cover data-type="files"></th><th data-hidden></th><th data-hidden data-card-target data-type="content-ref"></th></tr></thead><tbody><tr><td><strong>Tweed wallets optimize security and recoverability</strong></td><td><a href="#tweed-wallets-optimize-security-and-recoverability"><mark style="color:blue;background-color:yellow;">🔗 Click to jump to section</mark></a></td><td></td><td></td><td><a href="broken://pages/1yta2YFz9Iv3Ps7Rw8BW#tweed-wallets-optimize-security-and-recoverability">Broken link</a></td></tr><tr><td><strong>Tweed offers a completely self-custodial wallet</strong></td><td><a href="#tweed-offers-a-completely-self-custodial-wallet"><mark style="color:blue;background-color:yellow;">🔗 Click to jump to section</mark></a></td><td></td><td></td><td><a href="broken://pages/1yta2YFz9Iv3Ps7Rw8BW#tweed-offers-a-completely-self-custodial-wallet">Broken link</a></td></tr><tr><td><strong>Only users control their keys - no exceptions</strong></td><td><a href="#only-users-control-their-keys-no-exceptions"><mark style="color:blue;background-color:yellow;">🔗 Click to jump to section</mark></a></td><td></td><td></td><td><a href="broken://pages/1yta2YFz9Iv3Ps7Rw8BW#only-users-control-their-keys-no-exceptions">Broken link</a></td></tr><tr><td><strong>Users can recover their wallets with a social login</strong><br></td><td><a href="#users-can-recover-their-wallets-with-a-social-login"><mark style="color:blue;background-color:yellow;">🔗 Click to jump to section</mark></a></td><td></td><td></td><td><a href="broken://pages/1yta2YFz9Iv3Ps7Rw8BW#users-can-recover-their-wallets-with-a-social-login">Broken link</a></td></tr><tr><td><strong>Offer a completely Web2 experience for token purchases</strong></td><td><a href="#offer-a-completely-web2-experience-for-nft-purchases"><mark style="color:blue;background-color:yellow;">🔗 Click to jump to section</mark></a></td><td></td><td></td><td><a href="broken://pages/1yta2YFz9Iv3Ps7Rw8BW#offer-a-completely-web2-experience-for-nft-purchases">Broken link</a></td></tr></tbody></table>

***

## 🔐 Tweed wallets optimize security and recoverability

#### What is a crypto wallet?

> A crypto wallet is an application that stores a user's blockchain-based assets, such as cryptocurrencies, tokens, and NFTs. Just as importantly, a crypto wallet enables users to carry out transactions on the blockchains, like paying for goods and services with cryptocurrencies or purchasing or minting NFTs.\
> \
> Another crucial purpose of a crypto wallet is storing two pieces of information that are essential to blockchain transactions: a user's **public key** and **private key.**  A user's public key is visible to everyone and is used to generate the wallet address to which others can send the user cryptocurrencies and other on-chain assets. \
> \
> In contrast, a private key enables a user to sign, i.e., authorize, blockchain transactions and should only be known to the user. Signing a transaction proves that the user is the owner of the wallet; with this proof, a user can spend crypto and transfer assets out of their wallet. As a result, anyone who holds the wallet's private keys can control the funds or assets within it without any restrictions or limits. In short, whoever possesses the user's private key controls their crypto wallet and the assets it contains, so it's vital for the user to retain ownership of their private keys to ensure the security of their on-chain assets.

This is why **a good crypto wallet must have two mechanisms that are equally important**:

<table data-card-size="large" data-view="cards"><thead><tr><th></th><th></th><th data-hidden data-card-cover data-type="files"></th></tr></thead><tbody><tr><td><strong>Security</strong></td><td>To prevent unauthorized users from controlling the user's assets</td><td><a href="broken://files/kZ6GCHbItJQyRya3gd2X">Broken link</a></td></tr><tr><td><strong>Recoverability</strong></td><td>To prevent the user from losing access to their wallet and its contained assets </td><td><a href="broken://files/HW7Dad7Ic28OzysSKoHj">Broken link</a></td></tr></tbody></table>

{% hint style="info" %}
Tweed wallets optimize for security and recoverability. To understand how, read more below.
{% endhint %}

***

## Tweed offers a completely self-custodial wallet

Tweed's [Wallet as a Service](https://tweed.gitbook.io/tweed-v1-wallets-integration/) product offers 100% self-custodial wallets: only the owner of the wallet can sign transactions, spend crypto, and transfer assets. The user's private key is stored in a way that can only be recovered by the user and can never be accessed by Tweed or the integrated platform.

Crypto wallets are either **self-custodial** or **custodial**. The differences are defined below:

**What are self-custodial wallets?**

> The user is responsible for managing their self-custodial wallet and should be the only one with access to their private key and assets. A fully self-custodial solution provider has no way of recreating or recovering the user's keys. This is where the technology comes into play and where the difference between each proclaimed self-custodial wallet provider lies: if the wallet provider has any way to access the user's private keys, the wallet is not truly self-custodial. MetaMask is a great example of a true self-custodial wallet provider.

**What are custodial wallets?**

> Alternatively, a user can keep their assets with a custodian, such as a crypto exchange like Coinbase or Binance. The user does not have to manage their wallet or protect their private keys; the custodian manages a user's keys for them. A custodial wallet's UI is often simpler than a self-custodial wallet, and a user just needs a username/password or SSO. The downside, however, is that the user's assets are managed by an external party, and a breach suffered by the external party jeopardizes the security of the assets within the wallet.&#x20;

***

## 🔑 Only users control their keys - no exceptions

{% hint style="success" %}
Keys are generated, sharded, encrypted, and decrypted on your end user's device, with user secrets - **no exceptions**.
{% endhint %}

Tweed's proprietary key management solution uses a social login, e.g., Google, to secure users' wallets. Seed phrases are optional but never mandatory.

***

## Users can recover their wallets with a social login

{% hint style="info" %}
*Users no longer have to store a 12-word seed phrase to recover their assets and risk losing them forever.*
{% endhint %}

The risk with private keys is that losing them will render the user's funds useless and will not be recoverable by anyone else.\
\
With many self-custodial crypto providers, users are required to store a 12-word seed, or mnemonic, phrase that is only shown once upon wallet creation. Traditionally, users need this phrase to regain access to their wallet, whether on the same device or a new device.

***

## 💳 Offer a completely Web2 experience for tokens purchases&#x20;

With Tweed's Token Checkout solution, buyers can purchase tokens in the same way they purchase anything else online: with their debit or credit card or Apple or Google Pay. As a result, knowledge of and familiarity with Web3 technology are abstracted from the user: they don't need to own any crypto - and Tweed handles the gas fees!

Coupled with our [Wallet as a Service](broken://pages/1074GhFxQag8yq2Vft62) solution, buyers don't need to own crypto or even have a wallet before purchasing your tokens, removing friction from the customer experience.&#x20;


# What Can Tweed Do?

Tweed's solution is built around four key pillars: Wallets, Connectivity, Payments, and Authentication

<figure><img src="https://2034179314-files.gitbook.io/~/files/v0/b/gitbook-x-prod.appspot.com/o/spaces%2FgQyCg5IN7Cv6AnUUpGl2%2Fuploads%2FATRZ8xfbBrMLkwKtwggb%2Fimage%20of%20tweed.png?alt=media&amp;token=2ae5e237-182c-48c3-a537-b6d52ffde3c4" alt=""><figcaption></figcaption></figure>

## Incorporate self-custodial wallets into your dApp

All it takes to create a wallet is calling `sdk.wallet.create()`. You have full control over the UI/UX of your platform and how much detail of the wallet you want to show to your users - whether they are web2 users with little-to-no crypto knowledge or web3 natives.

## Add a "Pay with Credit Card" option to your platform

Offer additional payment methods and open new revenue streams by adding a "Pay with Card" button and flow to your platform.

## Login to Backend Resources

Tweed provides the most secure login mechanism that allows your users to log-in to your platform using their wallet, no need for an external log-in provider any more.

## Multi-Chain support

Every Tweed wallet automatically supports all of the blockchains we support - meaning users can hold assets from all of these chains in one single wallet.

No need to add new lines of code for every new chain addition - live wallets are automatically updated with new chain additions!


# Embedded Wallets | WaaS

Develop your own platform wallets to offer users secure and recoverable options for signing transactions, spending cryptocurrency, and transferring assets.

<figure><img src="https://2034179314-files.gitbook.io/~/files/v0/b/gitbook-x-prod.appspot.com/o/spaces%2FgQyCg5IN7Cv6AnUUpGl2%2Fuploads%2FL1kPZqmDzc2HJWORp9DA%2Fwallet-as-a-service.png?alt=media&amp;token=9dfd1135-98c1-4a9e-a49c-8473250c0231" alt="embedded wallet-as-a-service in a phone screenshot"><figcaption></figcaption></figure>

> Related topics
>
> [WaaS](/products/waas)&#x20;

> Associated Development tools
>
> [Management Dashboard](/developer-tools/management-dashboard)
>
> &#x20;[core-react](/developer-tools/tweed-sdks/core-react) | [core-js](/developer-tools/tweed-sdks/core-js) | [core-vue](/developer-tools/tweed-sdks/core-vue)

> Examples
>
> [Example Projects](/developer-tools/example-projects)

{% tabs %}
{% tab title="React" %}

### &#x20;1. Create new Application

Go to the [Tweed Management Console](https://dashboard.paytweed.com/) and [create a new application](/developer-tools/management-dashboard/create-application). This will generate a unique application ID for your application, which you will need to provide to the Tweed SDK. From the console, you can manage the application and modify its settings.

### 2. Add tweed to your React app

install [tweed SDK](https://www.npmjs.com/package/@paytweed/core-react) to your React app.

{% code fullWidth="false" %}

```bash
npm i @paytweed/core-react
```

{% endcode %}

### 3. Integrate Tweed Provider into Your App

Import the Tweed provider from the Tweed React SDK and wrap your application with it. Use the `applicationId` from the management console.

#### &#x20;Add networks

Specify the networks your application will use by passing them to the [Tweed provider](/developer-tools/tweed-sdks/core-react#tweed-provider). Import the `Network` enum from the React SDK.

{% code title="App.tsx" %}

```tsx
import { Network, TweedProvider } from "@paytweed/core-react";
import DemoPage from "pages/demo";

function App() {
  return (
    <>
      <TweedProvider
        applicationId="YOUR_APP_ID"
          options={{
          chains: [Network.POLYGON, Network.ETHEREUM]
          }}
      >
        <HomePage />
      </TweedProvider>
    </>
  );
}
```

{% endcode %}

### 4. Connect the User

Once the Tweed SDK is set up in your application, the first step is to connect the user. Use the [`connect`](/developer-tools/tweed-sdks/core-react/useauth#connect-users) function from the [`useAuth`](/developer-tools/tweed-sdks/core-react/useauth) hook to display the sign-up/in modal. This allows users to create an account, and a wallet is automatically created for them. You can offer multiple sign-up options; for more details, visit here.

{% hint style="info" %}
Utilize the `loading` state from the `useTweed` hook to manage the loading state, and implement a check to verify that the Tweed `client` is initialized.
{% endhint %}

{% code title="HomePage.tsx" %}

```tsx
import { useAuth, useTweed } from "@paytweed/core-react";

function HomePage() {
  const { connect } = useAuth()
  const { client, loading } = useTweed();
    
  function handleConnect() {
    if(!client) return
    connect()
  }
  
  return (
    <>
      <h1>HomePage</h1>
      { loading ?
        <h2> loading... </h2> :
       <button onClick={handleConnect}>connect</button> 
       }
    </>
  );
}

export default HomePage;
```

{% endcode %}

{% hint style="success" %}
**Token Checkout**\
If you are integrating WaaS for token checkout, you are done at this point and can return to continue the [token checkout integration](/getting-started/token-checkout-or-payments/legacy-token-checkout/checkout-+-waas-+-auth)
{% endhint %}

### 5. Create Ethereum Provider

With the user logged in and authenticated, we are able to get the [Ethereum provider](/developer-tools/tweed-sdks/core-react/useweb3#ethereum-provider-or-eip-1193) to handle on-chain actions like sending transactions or checking balances.

#### import [`useWeb3`](/developer-tools/tweed-sdks/core-react/useweb3) hook from tweed SDK

```tsx
import { useWeb3, Network } from "@paytweed/core-react";
```

#### obtain the Ethereum provider

Create a state to hold the [provider](/developer-tools/tweed-sdks/core-react/useweb3#ethereum-provider-or-eip-1193) and a function to obtain it. In this example, we use the `useEffect` hook to initialize the provider as soon as the user connects, making it available immediately.

```tsx
const { getEthereumProvider } = useWeb3();

const [provider, setProvider] = useState<BrowserProvider | null>(null);

async function getProvider() {
  const provider = await getEthereumProvider(Network.ETHEREUM_SEPOLIA);
  const web3provider = new BrowserProvider(provider);
  setProvider(web3provider);
}d

useEffect(() => {
  getProvider();
}, [provider]);
```

**Updating Our Page with the New Code**

{% code title="HomePage.tsx" %}

```tsx
import { useAuth, useTweed, useWeb3, Network } from "@paytweed/core-react";
import { BrowserProvider } from "ethers";
import { useState, useEffect } from "react";

function HomePage() {
  const { connect } = useAuth();
  const { client, loading } = useTweed();
  const { getEthereumProvider } = useWeb3();
  
  const [provider, setProvider] = useState<BrowserProvider | null>(null);
  
  async function getProvider() {
    const provider = await getEthereumProvider(Network.ETHEREUM_SEPOLIA);
    const web3provider = new BrowserProvider(provider);
    setProvider(web3provider);
  }
  
  useEffect(() => {
    getProvider();
  }, [provider]);
  
  function handleConnect() {
    if (!client) return;
    connect();
  }
  
  return (
    <>
      <h1>HomePage</h1>
      {loading ? (
        <h2>loading...</h2>
      ) : (
        <button onClick={handleConnect}>connect</button>
      )}
    </>
  );
}

export default HomePage;
```

{% endcode %}

### 6. Test the Integration

Let's create a transaction using the `sendTransaction` function from `ethers`.

<pre class="language-tsx"><code class="lang-tsx">async function sendTransaction() {
    if (!provider) return;
    const signer = await provider.getSigner();
    const txHash = await signer.sendTransaction({
      to: "0x03928fc2FD91491919F55C8658477fE1352338E7",
      value: "0.1",
    });
    console.log('transaction sent', txHash);
<strong>  }
</strong></code></pre>

**Updating Our Page with the New Code**

```tsx
import { useAuth, useTweed, useWeb3, Network } from "@paytweed/core-react";
import { BrowserProvider } from "ethers";
import { useState, useEffect } from "react";

function HomePage() {
  const { connect } = useAuth();
  const { client, loading } = useTweed();
  const { getEthereumProvider } = useWeb3();
  
  const [provider, setProvider] = useState<BrowserProvider | null>(null);
  
  async function getProvider() {
    const provider = await getEthereumProvider(Network.ETHEREUM_SEPOLIA);
    const web3provider = new BrowserProvider(provider);
    setProvider(web3provider);
  }
  
  useEffect(() => {
    getProvider();
  }, [provider]);
  
  function handleConnect() {
    if (!client) return;
    connect();
  }
  
  async function handleSendTransaction() {
    if (!provider) return;
    const signer = await provider.getSigner();
    const txHash = await signer.sendTransaction({
      to: "0x03928fc2FD91491919F55C8658477fE1352338E7",
      value: "0.1",
    });
    console.log('transaction sent', txHash);
  }
  
  return (
    <>
      <h1>HomePage</h1>
      {loading ? (
        <h2>loading...</h2>
      ) : (
      <div>
        <button onClick={handleConnect}>connect</button>
        <button onClick={handleSendTransaction}>send tx.</button>
      </div>
      )}
    </>
  );
}

export default HomePage;
```

{% endtab %}

{% tab title="HTML" %}

### &#x20;1. Create new Application

Go to the [Tweed Management Console](https://www.console-v2.paytweed.com/) and [create a new application](/developer-tools/management-dashboard/create-application). This will generate a unique application ID for your application, which you will need to provide to the Tweed SDK. From the console, you can manage the application and modify its settings.

### 2. Add tweed to your app

install [tweed SDK](https://www.npmjs.com/package/@paytweed/core-react) to your app.

{% code fullWidth="false" %}

```bash
npm i @paytweed/core-js
```

{% endcode %}

### 3. Initialize Tweed client into Your App

Import the `TweedClient` from the `@paytweed/core-js` SDK, and initialize it using the `create()` function. Use the [`applicationId`](#user-content-fn-1)[^1] from the management console and specify the networks your application will use by passing them to the Tweed provider. Import the `Network` enum from the SDK.

{% code title="index.ts" %}

```typescript
import { Network, TweedClient } from "@paytweed/core-js";

const chains = [Network.ETHEREUM, Network.POLYGON];
const appId = 'YOUR_APP_ID';
let tweed = null;

async function initializeTweedClient(appId, chains) {
  if (!client) {
     tweed = TweedClient.create(appId, { chains });
 }
```

{% endcode %}

### 4. Connect the User

Once the Tweed SDK is set up in your application, the first step is to connect the user. Use the `connect` function to display the sign-up/in modal. This allows users to create an account, and a wallet is automatically created for them. You can offer multiple sign-up options; for more visit the tweed dashboard.

{% code title="index.ts" %}

```typescript
async function connectUser() {
  if (tweed) {
    const accessToken = await tweed.connect();
    }
}
```

{% endcode %}

**Updating Our Page with the New Code**

Add the connect function to `index.ts`,  and create a new function to listen for events from the button we will create in the next step and trigger the `connectUser` function.

{% code title="index.ts" %}

```typescript
import { Network, TweedClient } from "@paytweed/core-js";

const chains = [Network.ETHEREUM, Network.POLYGON];
const appId = 'YOUR_APP_ID';
let tweed = null;

async function initializeTweedClient(appId, chains) {
  if (!client) {
 tweed = TweedClient.create(appId, { chains });
 }
 
 async function connectUser() {
  if (tweed) {
    const accessToken = await tweed.connect();
}

//this will use by the buton will added in the next step
document.getElementById("connectButton").addEventListener("click", async () => {
  try {
    await initializeTweedClient(appId, chains);
    await connectUser();
  } catch (error) {
    console.error("Error connecting to Tweed:", error);
  }
});
```

{% endcode %}

#### Create index.html page

Add the `index.ts` file we just created into a `<script>` with the type `module`, and create a button.

{% code title="index.html" %}

```html
<!DOCTYPE html>
<html lang="en">
<head>
  <meta charset="UTF-8">
  <meta name="viewport" content="width=device-width, initial-scale=1.0">
  <title>Tweed Core-JS Example</title>
  <script type="module" defer src="index.js"></script>
</head>
<body>
  <h1>Tweed Core-JS Example</h1>
  <button id="connectButton">logIn/signup to wallet</button>
</body>
</html>
```

{% endcode %}

### 5. Create Ethereum Provider

With the user logged in and authenticated, we can get the Ethereum provider to handle on-chain actions like sending transactions or checking balances.

```typescript
import { BrowserProvider } from "ethers";

async function getEthProvider() {
  const tweedProvider = await tweed.getEthereumProvider(Network.ETHEREUM_SEPOLIA);
  const provider = new BrowserProvider(tweedProvider);
}
```

**Updating `index.ts` with the New Code**

Update `index.ts` to include the `getEthProvider` function.

{% code title="index.ts" %}

```typescript
import { Network, TweedClient } from "@paytweed/core-js";
import { BrowserProvider } from "ethers";

const chains = [Network.ETHEREUM, Network.POLYGON];
const appId = 'YOUR_APP_ID';
let tweed = null;
let provider = null

async function initializeTweedClient(appId, chains) {
  if (!client) {
 tweed = TweedClient.create(appId, { chains });
 }
 
 async function connectUser() {
  if (tweed) {
    const accessToken = await tweed.connect();
}

async function getEthProvider() {
  if (!provider) {
    const tweedProvider = await tweed.getEthereumProvider(Network.ETHEREUM_SEPOLIA);
    provider = new BrowserProvider(tweedProvider);
  }

document.getElementById("connectButton").addEventListener("click", async () => {
  try {
    await initializeTweedClient(appId, chains);
    await connectUser();
  } catch (error) {
    console.error("Error connecting to Tweed:", error);
  }
});
```

{% endcode %}

### 6. Test the Integration

Let's create a transaction using the `sendTransaction` function from `ethers`.

```typescript
async function sendTransaction() {
    if (!provider) return;
    const signer = await provider.getSigner();
    const txHash = await signer.sendTransaction({
      to: "0x03928fc2FD91491919F55C8658477fE1352338E7",
      value: "0.1",
    });
    console.log('transaction sent', txHash);
  }
```

**Updating `index.ts` with the New Code**

Add the `sendTransaction` function and create a new function to listen for events from the button we will create in the next step and trigger the `sendTransaction` function.

{% code title="index.ts" %}

```typescript
import { Network, TweedClient } from "@paytweed/core-js";
import { BrowserProvider } from "ethers";

const chains = [Network.ETHEREUM, Network.POLYGON];
const appId = 'YOUR_APP_ID';
let tweed = null;
let provider = null;

async function initializeTweedClient(appId, chains) {
  if (!tweed) {
    tweed = TweedClient.create(appId, { chains });
  }
}

async function connectUser() {
  if (tweed) {
    const accessToken = await tweed.connect();
  }
}

async function getEthProvider() {
  if (!provider) {
    const tweedProvider = await tweed.getEthereumProvider(Network.ETHEREUM_SEPOLIA);
    provider = new BrowserProvider(tweedProvider);
  }
}

async function sendTransaction() {
  if (!provider) return;
  const signer = await provider.getSigner();
  const txHash = await signer.sendTransaction({
    to: "0x03928fc2FD91491919F55C8658477fE1352338E7",
    value: "0.1",
  });
  console.log('Transaction sent', txHash);
}

document.getElementById("connectButton").addEventListener("click", async () => {
  try {
    await initializeTweedClient(appId, chains);
    await connectUser();
  } catch (error) {
    console.error("Error connecting to Tweed:", error);
  }
});

document.getElementById("sendTx").addEventListener("click", async () => {
  try {
    await getEthProvider();
    await sendTransaction();
  } catch (error) {
    console.error("Error sending transaction:", error);
  }
});
```

{% endcode %}

**Add sendTx button to the page**

{% code title="index.html" %}

```html
<!DOCTYPE html>
<html lang="en">
<head>
  <meta charset="UTF-8">
  <meta name="viewport" content="width=device-width, initial-scale=1.0">
  <title>Tweed Core-JS Example</title>
  <script type="module" defer src="index.js"></script>
</head>
<body>
  <h1>Tweed Core-JS Example</h1>
  <button id="connectButton">Log In/Sign Up to Wallet</button>
  <button id="sendTx">Send Transaction</button>
</body>
</html>
```

{% endcode %}
{% endtab %}
{% endtabs %}

### Next steps

<table data-view="cards"><thead><tr><th></th><th></th><th data-type="content-ref"></th><th data-hidden data-card-target data-type="content-ref"></th></tr></thead><tbody><tr><td><strong>Manage User Authentication Options</strong></td><td>The Tweed SDK provides various methods for logging users into your application. Learn how to manage these options.</td><td><a href="/developer-tools/management-dashboard">Management Dashboard</a></td><td><a href="broken://pages/Wbs314rnW0FBNz29gbZG">Broken link</a></td></tr><tr><td><strong>Complete your integration</strong></td><td>Explore the full suite of Tweed SDK functions and features to complete your integration journey.</td><td><a href="/developer-tools/tweed-sdks">Tweed SDKs</a></td><td></td></tr><tr><td><strong>Update Appearance</strong></td><td>Modify the appearance by adjusting Tweed widgets and modals, like login or sign transaction, to align with your own application design.</td><td><a href="/developer-tools/management-dashboard/create-application/ui-customization">UI Customization</a></td><td></td></tr></tbody></table>

[^1]: Your application-id is required when calling this function, as it identifies your application to tweed.\
    \
    [Management Dashboard](/developer-tools/management-dashboard)


# Token Checkout | Payments

Start selling fungible and non-fungible tokens in your platform

<figure><img src="https://2034179314-files.gitbook.io/~/files/v0/b/gitbook-x-prod.appspot.com/o/spaces%2FgQyCg5IN7Cv6AnUUpGl2%2Fuploads%2F0I1CbFsXljH865YviZRs%2Ftoken%20-checkout.png?alt=media&amp;token=b1f13b24-d10b-4d3a-bdd3-1f225fdc1f70" alt="token checkout widgets screenshot"><figcaption></figcaption></figure>

### Add Payment Flow to Your Application with Tweed

With Tweed, adding a seamless payment flow to your application has never been easier. Whether you’re building an e-commerce site, a subscription service, or any platform that requires payments, our simple and quick integration process will get you up and running in no time.

#### Quick Integration with Our SDK

Our easy-to-use SDK allows you to integrate the payment widget directly into your application. By simply adding a few lines of code, you can enable your users to complete transactions securely and efficiently.

#### Payment Methods Supported

* **Credit Card**: Users can pay securely using their credit card.
* **Apple Pay**: Allow users to complete payments using Apple Pay for a smooth, frictionless experience.
* **Google Pay**: Enable Google Pay for users who prefer this convenient method.

#### Tokenized Payments

Once payments are completed, users will receive tokens. These tokens can be used for future transactions or as part of your app's reward system, providing a flexible way to manage payments and rewards.


# Flow of Funds: Purchase to Settlement

How Tweed manages payouts in accordance with a buyer's journey on your platform

## **Overview**[**​**](https://docs.paytweed.com/nft-flow-of-funds/#overview)

Tweed allows the client platform to choose out of 4 types of payment settlements:

* Paid ERC-20 Crypto settlement&#x20;
* Paid Native Crypto settlement
* Fiat settlement
* And Free-minting (no settlement)

You may use a different settlement for each asset you have.

***

## **Flow for Fiat Settlement**[**​**](https://docs.paytweed.com/nft-flow-of-funds/#flow-of-funds-fiat-settlement)

1. The buyer enters their card details and presses the "Buy" button
2. Tweed holds the value from their card
3. Tweed passes a request to the relevant claimer (according to the blockchain)
4. The claimer calls the platform's collection contract to "mint and send" the NFT
5. The collection's contract sends the NFT to the buyer's wallet
6. Tweed captures the money from the buyer's card and sends it to the platform's account
7. (optional) Tweed backend calls the webhook configured in the console with the purchase details

<figure><img src="https://2034179314-files.gitbook.io/~/files/v0/b/gitbook-x-prod.appspot.com/o/spaces%2FgQyCg5IN7Cv6AnUUpGl2%2Fuploads%2FaRxavhQvpT21rMRt5WMt%2FScreenshot%202024-07-16%20at%2015.34.05.png?alt=media&amp;token=73a0d3b0-4145-4888-8bcf-a0372a670d51" alt=""><figcaption></figcaption></figure>

***

## **Flow for Crypto Settlement (Native Currency)**

1. Tweed converts the cryptocurrency to its equivalent fiat value
2. The buyer enters their card details and presses the "Buy" button
3. Tweed holds the NFT value from the buyer's card
4. Tweed passes a request to the relevant claimer (according to the blockchain)
5. Tweed's claimer calls the platform's collection contract to "mint and send" the NFT with the right amount of crypto
6. The collection's contract sends the NFT to the buyer's wallet
7. Tweed captures the money from the buyer's card
8. (optional) Tweed backend calls the webhook configured in the console with the purchase details

<figure><img src="https://2034179314-files.gitbook.io/~/files/v0/b/gitbook-x-prod.appspot.com/o/spaces%2FgQyCg5IN7Cv6AnUUpGl2%2Fuploads%2FJo4EJZNxCQqj26FReumx%2FScreenshot%202024-07-16%20at%2015.35.12.png?alt=media&amp;token=4a8ef1a3-2338-43ea-88d6-67772793a32c" alt=""><figcaption></figcaption></figure>

***

## **Flow for Crypto Settlement (ERC20 Tokens)**

1. Tweed converts the ERC20 tokens value to its equivalent fiat value
2. The buyer enters their card details and presses the "Buy" button
3. Tweed holds the NFT value from the buyer's card
4. Tweed passes a request to the relevant claimer (according to the blockchain)
5. The chosen ERC20 token's amount is getting approved for the platform to withdraw
6. Tweed's claimer calls the contract's "mint and send"
7. The contract withdrow the funds from tweed's claimer&#x20;
8. The contract send the tokens to the user's wallet
9. Tweed captures the money from the buyer's card
10. (optional) Tweed backend calls the webhook configured in the console with the purchase details

<figure><img src="https://2034179314-files.gitbook.io/~/files/v0/b/gitbook-x-prod.appspot.com/o/spaces%2FgQyCg5IN7Cv6AnUUpGl2%2Fuploads%2Fc8ERJbk5rGRyVoEpcAsO%2FScreenshot%202024-07-16%20at%2015.36.14.png?alt=media&amp;token=3c23ec78-f969-4ad5-bd19-722bd94197ab" alt=""><figcaption></figcaption></figure>

***


# Token Checkout

Effortless Integration for Selling Tokens: Simplified Like Never Before

Tweed  introduces groundbreaking improvements to both user experience and developer workflow. Start selling tokens faster than ever—v2 eliminates the need for backend integration, streamlining the process from start to finish. Manage your tokens and collections effortlessly through our powerful dashboard, or take full control with our lightning-fast API.

## Get started

Follow this guide to start selling tokens on your platform:

### 1. Create new Application in tweed's dashboard

Go to our [dashboard](https://dashboard.paytweed.com/), sign up or sign in, and create a new application. Your application will be assigned a unique ID, which we will use throughout the Tweed SDK to identify your application.

<figure><img src="https://2034179314-files.gitbook.io/~/files/v0/b/gitbook-x-prod.appspot.com/o/spaces%2FgQyCg5IN7Cv6AnUUpGl2%2Fuploads%2F0YGQLCOCIOBaRxlOrPrt%2FScreenshot%202024-12-22%20at%2010.19.36.png?alt=media&amp;token=f9195477-7eb0-43f1-82b4-711cc86a8519" alt=""><figcaption></figcaption></figure>

### 2. Add new Item to your collection

Items represent the tokens or products you want to sell on your platform. You can create as many items as you like, each associated with a specific smart contract.

If this is the first item you're introducing to the system, you'll need to add a smart contract and configure a payout method:

* **Add a Smart Contract:** Specify the blockchain, the contract address, and its ABI. Note the ABI input must contain the field "amount" with the exact field name "amount".\
  \
  ![](https://2034179314-files.gitbook.io/~/files/v0/b/gitbook-x-prod.appspot.com/o/spaces%2FgQyCg5IN7Cv6AnUUpGl2%2Fuploads%2FNWwmCDIoiwgmyibXbYRa%2Fimage.png?alt=media\&token=0744653f-fc28-4d85-8e77-3b3c13d77bb5)

* **Configure Payouts:** Choose how you'd like to receive funds from sales. You can opt to receive native or stable coins directly to your smart contract or fiat currency directly into your bank account. You can configure different payout options for each item you sell.\
  \
  ![](https://2034179314-files.gitbook.io/~/files/v0/b/gitbook-x-prod.appspot.com/o/spaces%2FgQyCg5IN7Cv6AnUUpGl2%2Fuploads%2FdBfOMx2pQWySR8iz69s5%2Fimage.png?alt=media\&token=5b07e5ad-8e72-477f-9ddc-7ada78f0405d)

For each item, set the price, the fiat currency you want to sell in, and specify the contract function that will mint and transfer tokens to your customers.

<figure><img src="https://2034179314-files.gitbook.io/~/files/v0/b/gitbook-x-prod.appspot.com/o/spaces%2FgQyCg5IN7Cv6AnUUpGl2%2Fuploads%2Faj8w1ZNWx8VWK13ISdy4%2FScreenshot%202024-12-22%20at%2010.14.31.png?alt=media&amp;token=4df9a2f1-d2a3-469b-b89b-217ade2904a7" alt=""><figcaption></figcaption></figure>

Note that when you add an Item you should choose the function from the ABI and weather the input is fixed by the value in the dashboard or costumed by customParams (see section 6 of custom params). The amount should not be fixed if you want the sdk/user to edit the amount.\
\
![](https://2034179314-files.gitbook.io/~/files/v0/b/gitbook-x-prod.appspot.com/o/spaces%2FgQyCg5IN7Cv6AnUUpGl2%2Fuploads%2Fy20jjTPqjxTYwie6TRxJ%2Fimage.png?alt=media\&token=4595a1af-7949-43db-a74e-dfa7d0f9c1b7)

### 3. Add tweed to your React app

install [tweed SDK](https://www.npmjs.com/package/@paytweed/core-react) to your React app.

{% code fullWidth="false" %}

```bash
npm i @paytweed/core-react
```

{% endcode %}

### 4. Integrate Tweed Provider into Your App

Import the Tweed provider from the Tweed React SDK and wrap your application with it. Use the `applicationId` from the management console.

#### &#x20;Add networks

Specify the networks your application will use by passing them to the [Tweed provider](/developer-tools/tweed-sdks/core-react#tweed-provider). Import the `Network` enum from the React SDK.

{% tabs %}
{% tab title="React" %}
{% code title="App.tsx" %}

```tsx
import { Network, TweedProvider } from "@paytweed/core-react";
import DemoPage from "pages/demo";

function App() {
  return (
    <>
      <TweedProvider
        applicationId="YOUR_APP_ID"
          options={{
          chains: [Network.POLYGON, Network.ETHEREUM]
          }}
      >
        <HomePage />
      </TweedProvider>
    </>
  );
}
```

{% endcode %}
{% endtab %}

{% tab title="JS" %}
Coming soon
{% endtab %}
{% endtabs %}

### 5. Let's call the Buy token function

Use the `checkoutIntent` function from the `usePayments` hook to display the checkout widgets. Specify the item ID you want to sell. You can either provide the wallet address where the token will be sent or allow the user to input this address during the checkout flow.

```tsx
import { usePayments } from "@paytweed/core-react";

function HomePage() {
  const { checkoutIntent } = usePayments();

  async function handleCheckoutIntent() {
    await checkoutIntent({
      itemId: <ITEM_ID>,
    });
  }

  return (
    <>
      <h1>TWD Token</h1>
      <button onClick={handleCheckoutIntent}>Buy</button>
    </>
  );
}

export default HomePage;

```

### 6. Pre-populate Fields

In addition to the itemId you can pre-populate the following fields:\
customParams (for the non-fixed values), walletAddress, email and amount.\
If customParams and walletAddress and email are all 3 pre-filled the UI widget will be directly loaded to the payout form (credit details). For example:<br>

```tsx
  async function handleCheckoutIntent() {
    await checkoutIntent({
      itemId: <ITEM_ID>,
      customParams: { customer_id: "cust_id", order_id: "order_id"},
      walletAddress: <USER_WALLET_ADDRESS>,
      email: <USER_EMAIL>,
      amount: 3, //for example, the default is 1
    });
  }
```


# Legacy Token Checkout

{% hint style="danger" %}
This solution is deprecated, as we are migrating to a serverless solution in our new Token Checkout mechanism - [New Token Checkout](/getting-started/token-checkout-or-payments/token-checkout)

in V2 you don't need to have a backend for your application - all the catalog management is performed through our [Management Dashboard](/developer-tools/management-dashboard) / [API](/developer-tools/api/api-v2)
{% endhint %}

<figure><img src="https://2034179314-files.gitbook.io/~/files/v0/b/gitbook-x-prod.appspot.com/o/spaces%2FgQyCg5IN7Cv6AnUUpGl2%2Fuploads%2F0I1CbFsXljH865YviZRs%2Ftoken%20-checkout.png?alt=media&amp;token=b1f13b24-d10b-4d3a-bdd3-1f225fdc1f70" alt="token checkout widgets screenshot"><figcaption></figcaption></figure>

{% hint style="info" %}
**Before starting the integration**\
The token checkout process requires backend implementation to handle sensitive parameters like price and others. This ensures flexibility by allowing dynamic parameters for each transaction, even within the same contract. To facilitate this, we built a backend SDK for Node.JS servers, making the integration easy, secure, and convenient.
{% endhint %}

{% hint style="warning" %}
To begin use backend SDK please contact us to obtain API keys.
{% endhint %}

**Choose the integration that best fits your needs**

<table data-view="cards"><thead><tr><th align="center"></th><th></th><th data-hidden data-card-cover data-type="files"></th><th data-hidden data-card-target data-type="content-ref"></th></tr></thead><tbody><tr><td align="center"> <strong>Checkout only</strong></td><td>Simple and straightforward token checkout integration.</td><td><a href="https://2034179314-files.gitbook.io/~/files/v0/b/gitbook-x-prod.appspot.com/o/spaces%2FgQyCg5IN7Cv6AnUUpGl2%2Fuploads%2FrUeh8gLFeEHVEVtwr8rP%2Ftoken%20checkout.png?alt=media&amp;token=4b3e35c5-1288-4e9b-8b11-5aad9f234383">token checkout.png</a></td><td><a href="/getting-started/token-checkout-or-payments/legacy-token-checkout/basic-checkout-integration">Basic Checkout Integration</a></td></tr><tr><td align="center"><strong>Checkout + WaaS + Auth</strong></td><td>Full integration including token checkout, Wallet as a Service, and authentication all under one roof</td><td><a href="https://2034179314-files.gitbook.io/~/files/v0/b/gitbook-x-prod.appspot.com/o/spaces%2FgQyCg5IN7Cv6AnUUpGl2%2Fuploads%2FcJ6XVLRStAnbRbrsYwN3%2Fcheckout%20%2B%20waas%20%2B%20auth.png?alt=media&amp;token=eed2d3dd-1a2b-4bb9-b37a-412b0b28900f">checkout + waas + auth.png</a></td><td><a href="/getting-started/token-checkout-or-payments/legacy-token-checkout/checkout-+-waas-+-auth">Checkout + WaaS + Auth</a></td></tr></tbody></table>

> ### 💡<mark style="background-color:yellow;">**Not sure which solution is right for your use case?**</mark>&#x20;
>
> Don’t hesitate to [<mark style="color:blue;">contact us</mark>](mailto:hello@paytweed.com) for the best solution.

### Manage your integration

Explore the power of our API to seamlessly manage your integration: effortlessly add or remove contract addresses, curate your NFT collections, create whitelists, and unlock a world of possibilities. [Get started now](broken://pages/bKrL6VyNrnPtFbzLhaKr)

### Take your checkout one step further

Elevate your checkout experience to new heights. Explore our features and tailor your token checkout to suit your exact needs. Learn how easy it is to enhance user experience with just a few simple steps.\
Learn more about [token checkout features](/getting-started/token-checkout-or-payments/legacy-token-checkout/features)


# Basic Checkout Integration

To seamlessly integrate token checkout into your application, follow these steps

{% hint style="danger" %}
We are migrating to V2 soon, and all the payments SDK for V1 will become deprecated

in V2 you don't need to have a backend for your application - all the catalog management is performed through our [Management Dashboard](/developer-tools/management-dashboard) / [API](/developer-tools/api/api-v2)
{% endhint %}

<figure><img src="https://2034179314-files.gitbook.io/~/files/v0/b/gitbook-x-prod.appspot.com/o/spaces%2FgQyCg5IN7Cv6AnUUpGl2%2Fuploads%2FoedJl2Z5cIpc3lYoHe5G%2Ftoken%20checkout1.png?alt=media&amp;token=6cd4f494-ea70-44f5-a170-ef3ec7e338bd" alt="token checkout screenshots"><figcaption></figcaption></figure>

> Related topic
>
> [Payments](/products/payments)

> Associated Development tools
>
> [API (V1)](/developer-tools/api/api-v1)&#x20;
>
> [Payments SDKs (v1)](/developer-tools/tweed-sdks/payments-sdks-v1)

> Features
>
> [Payment links](/getting-started/token-checkout-or-payments/legacy-token-checkout/features/payment-links) | [Whitelist](/getting-started/token-checkout-or-payments/legacy-token-checkout/features/whitelist) | [Flow of Funds](/getting-started/token-checkout-or-payments/legacy-token-checkout/features/flow-of-funds) | [Apple & Google Pay](/getting-started/token-checkout-or-payments/legacy-token-checkout/features/apple-and-google-pay) \
> [AML & KYC Policy Overview](/getting-started/token-checkout-or-payments/legacy-token-checkout/features/aml-and-kyc-policy-overview) | [Dynamic Token Amount](/getting-started/token-checkout-or-payments/legacy-token-checkout/features/dynamic-token-amount) | [Marketplace Integration](/getting-started/token-checkout-or-payments/legacy-token-checkout/features/marketplace-integration)

> Examples
>
> [Example Projects](/developer-tools/example-projects)

### 1. Contact Tweed support for Payments API keys

You will receive two pairs of API keys. One pair is for the backend SDK, which authenticates your requests. The other pair is for facilitating your checkout implementation, such as adding contract addresses or creating whitelists.

### 2. List Your contract Address

introduce your contract address to tweed by our API, use the management API keys you got from us.\
read more how to deploy contract address [here](/developer-tools/api/api-v1#payments).

### 3. Let's start with the backend

#### 1. Add tweed to your Backend

```bash
npm i @paytweed/backend-sdk
```

#### 2. Setup

Import `TweedBackendSDK` from the `@paytweed/backend-sdk` and implement the setup function. Pass your API keys and specify the default blockchains for your application.

Next, we will create an endpoint to be accessed by the frontend SDK for sending and receiving messages. Within this endpoint, we will use the handleMessageFromFrontend function. This function will handle messages arriving from the frontend SDK, along with the user ID and user email.

{% hint style="info" %}
This implementation does not include WaaS. You can keep the user ID and email the same for each transaction, as demonstrated in our example. \
Alternatively, integrate our wallet product alongside the checkout process.
{% endhint %}

{% code title="index.ts" lineNumbers="true" %}

```typescript
import { TweedBackendSDK } from '@paytweed/backend-sdk'
import express from 'express'

const tweed = await TweedBackendSDK.setup({
  apiKey: 'YOUR_API_KEY',
  apiSecret: 'YOUR_API_SECRET',
  defaultBlockchainIds: ['ethereumSepolia'],
})

const app = express()
app.use(express.json())

app.post('/message', async (req, res) => {
  const userId = '1'
  const userEmail = 'a@a.com'
  
  const answer = await tweed.handleMessageFromFrontend(req.body.message, userId, userEmail)
  
  res.send({ answer })
})

app.listen(3000, () => console.log('Example app listening on port 3000'))
```

{% endcode %}

#### 3. Token checkout callback

{% hint style="success" %}
tweed facilitate multiple settlement options: you can receive payments via credit card and choose to receive funds in either fiat currency or crypto, including native chain currencies or ERC20 tokens.
{% endhint %}

{% hint style="info" %}
This example demonstrates settlement with fiat currency.\
[Here are guides for alternative settlement options](/getting-started/token-checkout-or-payments/legacy-token-checkout/features/flow-of-funds)
{% endhint %}

The next step involves handling this purchase on your backend. To accomplish this, you need to implement a callback function named `getTokenPurchaseData`. This function receives the `tokenId` parameter from the frontend as an input and expects to retrieve transaction details such as contract address, price, and other relevant information.

{% code title="tokenCheckout.ts" %}

```typescript
export const getTokenPurchaseData = async ({
  tokenId,
}: {
  tokenId: string
}) => {
  const tokenData = {
    tokenId,
    amount,
    tokenContractAddress,
    priceInCents:
    priceInCrypto:
    fiatCurrencyId:
    thumbnailPath:
    contractAddress:
    chain:
    title:
    description:
    abi:
    customMintParams: {
      amount,
    },
  }
  return tokenData
}
```

{% endcode %}

Please refer to the detailed: [Backend Payments SDK Reference](/developer-tools/tweed-sdks/payments-sdks-v1/backend-sdk-payments) for complete info regarding the purchase data callback.

Next, Add the function to the setup function:

{% code title="index.ts" %}

```typescript
// ...
const tweed = await TweedBackendSDK.setup({
  apiKey: 'YOUR_API_KEY',
  apiSecret: 'YOUR_API_SECRET',
  defaultBlockchainIds: ['ethereumSepolia'],
  callbacks: {
      getTokenPurchaseData // <<< Here
  }
})
// ...
```

{% endcode %}

### 4. Prepare the frontend

choose from our frontend SDKs for various frameworks: React, React Native, or vanilla JavaScript

{% tabs %}
{% tab title="React" %}

#### 1. Add tweed to your React app

install tweed SDK to your React app.

```bash
npm i @paytweed/frontend-sdk-react
```

#### &#x20;2.  Integrate Tweed Provider into Your App

* Import the `TweedFrontendSdkProvider` from the Tweed React SDK and wrap your application with it.
* Implement the function `sendMessageToBackend`, which will send a message to the backend SDK.<br>

  <pre class="language-tsx" data-title="App.tsx"><code class="lang-tsx">import { TweedFrontendSdkProvider } from '@paytweed/frontend-sdk-react'
  import DemoPage from "pages/demo";
  import { useCallback } from 'react'

  function App() {

  const sendMessageToBackend = useCallback(async (message: string) => {
      const response = await fetch('http://your-server.com/message', {
        body: JSON.stringify({ message }),
        headers: { 'Content-Type': 'application/json' },
        method: 'POST',
      })
      const { answer } = await response.json()
      return answer
    }, [])
    return (  
      &#x3C;>
        &#x3C;TweedFrontendSdkProvider
        sendMessageToBackend={sendMessageToBackend}
  <strong>      defaultBlockchainIds={['ethereumSepolia', 'polygonMumbai']}
  </strong>      theme="light" // "light" | "dark"
        >
          &#x3C;HomePage />
        &#x3C;/TweedFrontendSdkProvider>
      &#x3C;/>
    );
  }
  </code></pre>

{% hint style="warning" %}
To call the token checkout widget, a wallet must be created for the user associated with this widget. \
Even if you plan to specify a different wallet address for each transaction to receive the token, you must still have an existing wallet.
{% endhint %}

#### 3. Make sure user has wallet before calling token checkout widget

{% code title="HomePage.tsx" %}

```tsx
import React, { useState, useEffect } from 'react';
import { hooks } from '@paytweed/frontend-sdk-react';

function HomePage() {
  const frontendSDK = hooks.useTweedFrontendSDK();
  const [isWalletExist, setIsWalletExist] = useState(false);
    
  async function handleWalletCreation() {
    if (isWalletExist) return;
    await frontendSDK.wallet.create();
    setIsWalletExist(true);
  }

  useEffect(() => {
    if (!isWalletExist) handleWalletCreation();
  }, [isWalletExist]);


  return (
    <div>
      <h1>HomePage</h1>
    </div>
  );
}

export default HomePage;

```

{% endcode %}

#### 4. Let's call the buy token function

Use the `toWalletAddress` parameter within the `buyWithFiat` function to specify the destination wallet address where the token will be sent.

{% code title="HomePage.tsx" %}

```tsx
import { hooks } from '@paytweed/frontend-sdk-react';

function HomePage() {
  const frontendSDK = hooks.useTweedFrontendSDK();
  const [isWalletExist, setIsWalletExist] = useState(false);
    
  async function handleWalletCreation() {
    if (isWalletExist) return;
    await frontendSDK.wallet.create();
    setIsWalletExist(true);
  }

  useEffect(() => {
    if (!isWalletExist) handleWalletCreation();
  }, [isWalletExist]);
    
  async function onClickBuy() {
    try {
      await frontendSDK.token.buyWithFiat({
        tokenId: '1',
        toWalletAddress: '0x12'
        callbacks: {
          onSuccess: (payload) => {
            console.log('success', payload);
          },
        },
      });
    } catch (error) {
      console.error('Error buying token:', error);
    }
  }
  
  return (
    <div>
      <h1>HomePage</h1>
      <button onClick={onClickBuy}>Buy</button>
    </div>
  );
}

export default HomePage;
```

{% endcode %}
{% endtab %}

{% tab title="HTML" %}

```javascript
const message = "hello world";
console.log(message);
```

{% endtab %}
{% endtabs %}


# Checkout + WaaS + Auth

Leverage all the benefits Tweed offers in your application

{% hint style="danger" %}
We are migrating to V2 soon, and all the payments SDK for V1 will become deprecated

in V2 you don't need to have a backend for your application - all the catalog management is performed through our [Management Dashboard](/developer-tools/management-dashboard) / [API](/developer-tools/api/api-v2)
{% endhint %}

<figure><img src="https://2034179314-files.gitbook.io/~/files/v0/b/gitbook-x-prod.appspot.com/o/spaces%2FgQyCg5IN7Cv6AnUUpGl2%2Fuploads%2FdIjyF8kdAS4G2zyRmhGx%2Fcheckout%20%2B%20waas%20%2B%20auth1.png?alt=media&amp;token=9426467c-30c4-45bb-9105-0fdf429a5593" alt="token checkout and wallet screenshots "><figcaption></figcaption></figure>

> Related topics
>
> [Payments](/products/payments) | [WaaS](/products/waas)&#x20;

> Related Guide
>
> [Embedded Wallets | WaaS](/getting-started/embedded-wallets-or-waas)

> Associated Development tools
>
> [API (V1)](/developer-tools/api/api-v1)&#x20;
>
> [Payments SDKs (v1)](/developer-tools/tweed-sdks/payments-sdks-v1)

> Features
>
> [Payment links](/getting-started/token-checkout-or-payments/legacy-token-checkout/features/payment-links) | [Whitelist](/getting-started/token-checkout-or-payments/legacy-token-checkout/features/whitelist) | [Flow of Funds](/getting-started/token-checkout-or-payments/legacy-token-checkout/features/flow-of-funds) | [Apple & Google Pay](/getting-started/token-checkout-or-payments/legacy-token-checkout/features/apple-and-google-pay) \
> [AML & KYC Policy Overview](/getting-started/token-checkout-or-payments/legacy-token-checkout/features/aml-and-kyc-policy-overview) | [Dynamic Token Amount](/getting-started/token-checkout-or-payments/legacy-token-checkout/features/dynamic-token-amount) | [Marketplace Integration](/getting-started/token-checkout-or-payments/legacy-token-checkout/features/marketplace-integration)

> Examples
>
> [Example Projects](/developer-tools/example-projects)

{% hint style="warning" %}
Before starting this guide, ensure WaaS is already implemented in your application. If not, use the [following guide](/getting-started/embedded-wallets-or-waas)
{% endhint %}

### 1. Contact Tweed support for Payments API keys

You will receive two pairs of API keys. One pair is for the backend SDK, which authenticates your requests. The other pair is for facilitating your checkout implementation, such as adding contract addresses or creating whitelists.

### 2. List Your contract Address

introduce your contract address to tweed by our API, use the management API keys you got from us.\
read more how to deploy contract address [here](/developer-tools/api/api-v1#payments).

### 3. Let's start with the backend

#### 1. Add tweed to your Backend

```bash
npm i @paytweed/backend-sdk
```

#### 2. Setup

Import `TweedBackendSDK` from the `@paytweed/backend-sdk` and implement the setup function. Pass your API keys and specify the default blockchains for your application.

Next, we will create an endpoint to be accessed by the frontend SDK for sending and receiving messages. Within this endpoint, we will use the handleMessageFromFrontend function. This function will handle messages arriving from the frontend SDK, along with the user ID and user email.

{% hint style="info" %}
This implementation does not include WaaS. You can keep the user ID and email the same for each transaction, as demonstrated in our example. \
Alternatively, integrate our wallet product alongside the checkout process.
{% endhint %}

{% code title="index.ts" %}

```typescript
import { TweedBackendSDK } from '@paytweed/backend-sdk'
import express from 'express'

const tweed = await TweedBackendSDK.setup({
  apiKey: 'YOUR_API_KEY',
  apiSecret: 'YOUR_API_SECRET',
  defaultBlockchainIds: ['ethereumSepolia'],
})

const app = express()
app.use(express.json())

app.post('/message', async (req, res) => {
  const userId = '1'
  const userEmail = 'a@a.com'
  
  const answer = await tweed.handleMessageFromFrontend(req.body.message, userId, userEmail)
  
  res.send({ answer })
})

app.listen(3000, () => console.log('Example app listening on port 3000'))
```

{% endcode %}

#### 3. Token checkout callback

{% hint style="success" %}
tweed facilitate multiple settlement options: you can receive payments via credit card and choose to receive funds in either fiat currency or crypto, including native chain currencies or ERC20 tokens.
{% endhint %}

{% hint style="info" %}
This example demonstrates settlement with fiat currency.\
[Here are guides for alternative settlement options](/getting-started/token-checkout-or-payments/legacy-token-checkout/features/flow-of-funds)
{% endhint %}

The next step involves handling this purchase on your backend. To accomplish this, you need to implement a callback function named `getTokenPurchaseData`. This function receives the `tokenId` parameter from the frontend as an input and expects to retrieve transaction details such as contract address, price, and other relevant information.

{% code title="tokenCheckout.ts" %}

```typescript
export const getTokenPurchaseData = async ({
  tokenId,
}: {
  tokenId: string
}) => {
  return {
    tokenId,
    amount,
    tokenContractAddress,
    priceInCents:
    priceInCrypto:
    fiatCurrencyId:
    thumbnailPath:
    contractAddress:
    chain:
    title:
    description:
    abi:
    customMintParams: {
      amount,
    },
  }
}
```

{% endcode %}

Please refer to the detailed: [Backend Payments SDK Reference](/developer-tools/tweed-sdks/payments-sdks-v1/backend-sdk-payments) for complete info regarding the purchase data callback.

Next, Add the function to the setup function:

{% code title="index.ts" %}

```typescript
// ...
const tweed = await TweedBackendSDK.setup({
  apiKey: 'YOUR_API_KEY',
  apiSecret: 'YOUR_API_SECRET',
  defaultBlockchainIds: ['ethereumSepolia'],
  callbacks: {
      getTokenPurchaseData // << Here
  }
})
// ...
```

{% endcode %}

### 4. Prepare the frontend

choose from our frontend SDKs for various frameworks: React, React Native, or vanilla JavaScript

{% tabs %}
{% tab title="React" %}

#### 1. Add tweed Payments SDK to your React app:

```bash
npm i @paytweed/frontend-sdk-react
```

#### &#x20;2.  Integrate Tweed Provider (payments) into Your App

At this point, `TweedProvider` should already be in your app. Now, we are adding `TweedFrontendSdkProvider`to enable payments in your application.

* Import the `TweedFrontendSdkProvider` from the Tweed React SDK and wrap your application with it.
* Implement the function `sendMessageToBackend`, which will send a message to the backend SDK.<br>

  <pre class="language-tsx" data-title="App.tsx"><code class="lang-tsx">import { TweedFrontendSdkProvider } from '@paytweed/frontend-sdk-react'
  import { Network, TweedProvider } from "@paytweed/core-react";
  import HomePage from "pages/HomePage";
  import { useCallback } from 'react'

  function App() {
    const sendMessageToBackend = useCallback(async (message: string) => {
      const response = await fetch('http://your-server.com/message', {
        body: JSON.stringify({ message }),
        headers: { 'Content-Type': 'application/json' },
        method: 'POST',
      });
      const { answer } = await response.json();
      return answer;
    }, []);

    return (  
      &#x3C;>
        &#x3C;TweedFrontendSdkProvider
          sendMessageToBackend={sendMessageToBackend}
          defaultBlockchainIds={['polygon', 'ethereum']}
        >
          &#x3C;TweedProvider
            applicationId="YOUR_APP_ID"
            options={{
              chains: [Network.POLYGON, Network.ETHEREUM]
            }}
          >
            &#x3C;HomePage />
          &#x3C;/TweedProvider>
        &#x3C;/TweedFrontendSdkProvider>
      &#x3C;/>
    );
  }
  </code></pre>

{% hint style="warning" %}
To call the token checkout widget, a wallet must be created for the user associated with this widget on the payments SDK. Even though we are going to obtain the wallet address from the WaaS SDK for each transaction to receive the token, you must still have an existing wallet on the payments SDK.
{% endhint %}

#### 3. Make sure user has wallet before calling token checkout widget

{% code title="HomePage.tsx" %}

```tsx
import React, { useState, useEffect } from 'react';
import { hooks } from '@paytweed/frontend-sdk-react';
import { useAuth, useTweed } from "@paytweed/core-react";

function HomePage() {
  const { connect } = useAuth()
  const { client, loading } = useTweed();
  const frontendSDK = hooks.useTweedFrontendSDK();
  const [isWalletExist, setIsWalletExist] = useState(false);
  
  async function handleWalletCreation() {
    if (isWalletExist) return;
    await frontendSDK.wallet.create();
    setIsWalletExist(true);
  }

  useEffect(() => {
    if (!isWalletExist) handleWalletCreation();
  }, [isWalletExist]);
  
  
      function handleConnect() {
    if(!client) return
    connect()
  }


  return (
    <div>
      <h1>HomePage</h1>
            { loading ?
        <h2> loading... </h2> :
       <button onClick={handleConnect}>connect</button> 
       }
    </div>
  );
}

export default HomePage;
```

{% endcode %}

#### 4. Get the user wallet address

use the getEthereumProvider function from useWeb3 to obtain the user's wallet address. we will pass this address to the token checkout widget to handle sending the token to the user's wallet

```tsx
import { useState, useEffect } from 'react';
import { hooks } from '@paytweed/frontend-sdk-react';
import { useAuth, useTweed, useWeb3, Network } from "@paytweed/core-react";
import { BrowserProvider } from "ethers";

function HomePage() {
  const { connect } = useAuth();
  const { client, loading } = useTweed();
  const { getEthereumProvider } = useWeb3();
  const frontendSDK = hooks.useTweedFrontendSDK();
  const [isWalletExist, setIsWalletExist] = useState(false);
  const [walletAddress, setWalletAddress] = useState<string>();
  
  async function handleWalletCreation() {
    if (isWalletExist) return;
    await frontendSDK.wallet.create();
    setIsWalletExist(true);
  }
  
  useEffect(() => {
    if (!isWalletExist) handleWalletCreation();
  }, [isWalletExist]);
  
  function handleConnect() {
    if (!client) return;
    connect();
  }

  async function getWalletAddress() {
    const provider = await getEthereumProvider(Network.ETHEREUM_SEPOLIA);
    const web3provider = new BrowserProvider(provider);
    const signer = await web3provider.getSigner();
    const userAddress = await signer.getAddress();
    setWalletAddress(userAddress);
  }

  useEffect(() => {
    getWalletAddress();
  }, [walletAddress]);

  return (
    <div>
      <h1>HomePage</h1>
      {loading ? (
        <h2>Loading...</h2>
      ) : (
        <button onClick={handleConnect}>Connect</button>
      )}
    </div>
  );
}

export default HomePage;

```

#### 5. Let's call the buy token function

Use the `toWalletAddress` parameter in the `buyWithFiat` function to specify where the token should go. Use the wallet address we just got.

{% code title="HomePage.tsx" %}

```tsx
import { useState, useEffect } from 'react';
import { hooks } from '@paytweed/frontend-sdk-react';
import { useAuth, useTweed, useWeb3, Network } from "@paytweed/core-react";
import { BrowserProvider } from "ethers";

function HomePage() {
  const { connect } = useAuth();
  const { client, loading } = useTweed();
  const { getEthereumProvider } = useWeb3();
  const frontendSDK = hooks.useTweedFrontendSDK();
  const [isWalletExist, setIsWalletExist] = useState(false);
  const [walletAddress, setWalletAddress] = useState<string>();

  async function handleWalletCreation() {
    if (isWalletExist) return;
    await frontendSDK.wallet.create();
    setIsWalletExist(true);
  }

  useEffect(() => {
    if (!isWalletExist) handleWalletCreation();
  }, [isWalletExist]);

  function handleConnect() {
    if (!client) return;
    connect();
  }

  async function getWalletAddress() {
    const provider = await getEthereumProvider(Network.ETHEREUM_SEPOLIA);
    const web3provider = new BrowserProvider(provider);
    const signer = await web3provider.getSigner();
    const userAddress = await signer.getAddress();
    setWalletAddress(userAddress);
  }

  useEffect(() => {
    getWalletAddress();
  }, [walletAddress]);

  async function onClickBuy() {
  if(!isWalletExist) return
    try {
      await frontendSDK.token.buyWithFiat({
        tokenId: '1',
        toWalletAddress: walletAddress,
        callbacks: {
          onSuccess: (payload) => {
            console.log('success', payload);
          },
        },
      });
    } catch (error) {
      console.error('Error buying token:', error);
    }
  }

  return (
    <div>
      <h1>HomePage</h1>
      {loading ? (
        <h2>Loading...</h2>
      ) : (
        <button onClick={handleConnect}>Connect</button>
      )}
      <button onClick={onClickBuy}>Buy Token</button>
    </div>
  );
}

export default HomePage;

```

{% endcode %}
{% endtab %}
{% endtabs %}


# Features


# Payment links

create a payment links or use token checkout without using a frontend

Provides a URL to a widget enabling users to purchase an NFT using traditional payment methods such as payment cards, Google Pay, or Apple Pay. This URL can be utilized to send a purchase link to your user's email, for instance.

{% hint style="info" %}
The widget remains active indefinitely until it is first opened, after which it remains accessible for 24 hours. Once this period elapses, the widget becomes unusable.
{% endhint %}

#### Retrun type

```
Promise<{ widgetUrl: string; requestId: string }>
```

### Redirect URI

Provides the option to redirect users upon completing the checkout process, whether it is successful or unsuccessful.

{% hint style="warning" %}
**isTopWindow**  ensures widget Redirects is top-level window.
{% endhint %}

<details>

<summary><code>redirectUriOnSuccess</code> <mark style="color:purple;background-color:yellow;"><code>string</code></mark></summary>

**Description:** When the widget is closed after a succeeded transaction the widget will redirect to the supplied URL<br>

**Called with the transaction hash in the `txHash` URL param**

</details>

<details>

<summary>redirectUriOnFail <mark style="color:purple;background-color:yellow;"><code>string</code></mark></summary>

**Description:** When the widget is closed after a failed transaction the widget will redirect to the supplied URL

**Called with the reason to the failure in the error URL param**

</details>

### Example

```typescript
  const buyNftPayload: NftPurchaseBackendPayload = {
    nftId: "123", //Can be a ramdom generated by the user
    priceInCents: 100, //Optionally 0 for freemint 
    //priceInCrypto: 10000000000000, //If the user wants to get crypto instead of fiat
    fiatCurrencyId: 'USD',
    tokenUri: '<THUMBNAIL_URI>',
    contractAddress: '<NFT_ADDRESS>',
    chain: 'ethereumSepolia', //The chainId according to the Tweed docs
    title: '<NFT_NAME>',
    description: '<NFT_DESCRIPTION>',
    abi: 'safeMint(toAddress address, tokenUri string)',
      customMintParams: {
        toWalletAddress: "<WALLET_ADDRESS>", 
        tokenUri: "<TOKEN_URI>"
      }
  }
  
  // optional
  const widgetRedirectUris: BackendWidgetRedirectUri = {
    redirectUriOnSuccess: 'https://www.redirectUriOnSuccess.com',
    redirectUriOnFail: 'https://www.redirectUriOnFail.com/',
  }

  const widgetUrl = await backendSDK.nft.buyWithFiat(buyNftPayload, widgetRedirectUris)
  console.log({ widgetUrl })
```


# Whitelist

Wallets and Emails

Control access to your NFT Collection or In-Platform Tokens through wallet and/or email address whitelisting.

You can make your NFTs or Tokens exclusively available to a select group of wallet and/or email addresses that you provide.

Use API to create whitelisting to your tokens: [API (V1)](/developer-tools/api/api-v1)


# Flow of Funds

choose how to get funds; as fiat or crypto

Tweed offers you a platform to receive funds from checkout transactions according to your preference. You can choose to get the funds as fiat, which will be deposited into your bank account on a daily basis, or opt for immediate receipt in crypto, either as a native coin or ERC20 token.\
Learn more about Tweed's flow of funds.

The settlement method is determined by the payload of the `getTokenPurchaseData` callback. Review the required payload format for each settlement option.

### **Fiat Settlement**

{% hint style="info" %}
This option requires a quick additional onboarding. \
Contact us if you haven't completed it yet.
{% endhint %}

`priceInCents` Specify the price you want the user to pay in cents

```typescript
export const getTokenPurchaseData = async ({
  tokenId,
}: {
  tokenId: string
}) => {
  const tokenData = {
    tokenId,
    amount,
    priceInCents,
    fiatCurrencyId,
    thumbnailPath,
    contractAddress,
    chain,
    title,
    description,
    abi,
    customMintParams: {
      amount,
    },
  }
  return tokenData
}
```

### **Crypto Settlement | Native Currency**

`priceInCrypto`  Specify the price you want the user to pay in crypto (WEI)&#x20;

```typescript
export const getTokenPurchaseData = async ({
  tokenId,
}: {
  tokenId: string
}) => {
  const tokenData = {
    tokenId,
    amount,
    priceInCrypto,
    fiatCurrencyId,
    thumbnailPath,
    contractAddress,
    chain,
    title,
    description,
    abi,
    customMintParams: {
      amount,
    },
  }
  return tokenData
}
```

### **Crypto Settlement | ERC20 Tokens**

`priceInCrypto`  Specify the price you want the user to pay in crypto (WEI)&#x20;

`tokenContractAddress` Specify the ERC20 Token contract&#x20;

```typescript
export const getTokenPurchaseData = async ({
  tokenId,
}: {
  tokenId: string
}) => {
  const tokenData = {
    tokenId,
    amount,
    priceInCrypto,
    fiatCurrencyId,
    thumbnailPath,
    contractAddess,
    tokenContractAddress,
    chain,
    title,
    description,
    abi,
    customMintParams: {
      amount,
    },
  }
  return tokenData
}
```


# Apple & Google Pay

Enable Quick and Secure Checkout with Google and Apple pay

To enable Google Pay and Apple Pay for your Tweed token checkout modal, please follow the steps outlined below.

#### 1. Provide Your Domain Information

We need to know the domains where the Tweed token checkout modal is being displayed. This is likely your application domain. If you have multiple environments, such as **staging** and **production**, please send **all** the relevant domains.

#### 2. Setting Up for Apple Pay

To enable Apple Pay on your site, you'll need to follow these steps:

1. **Download the Apple Pay verification file**: [apple-developer-merchantid-domain-association](https://stripe.com/files/apple-pay/apple-developer-merchantid-domain-association).
2. **Host the file** at the following path on your server:

   ```bash
   /.well-known/apple-developer-merchantid-domain-association
   ```

For example, if you are registering `https://yourdomain.com`, make the file available at:

```html
https://yourdomain.com/.well-known/apple-developer-merchantid-domain-association
```

#### Final Steps

Once you've completed the above steps:

* Let us know, and we will enable Google Pay and Apple Pay on Tweed's end.

#### Important Points to Consider:

* **HTTPS Requirement**: You **cannot** test the Apple Pay/Google Pay integration locally because both require HTTPS. If you want to test locally, you can use a service like **ngrok** to tunnel HTTPS traffic to your local server.
* **Safari Compatibility**: Apple Pay works with iframes that load from different domains (in this case, your domain displays an iframe containing Tweed's domain), but this is supported **only** in the latest version of **Safari**. Ensure you are testing the integration under these conditions.

By following these instructions, you will be able to integrate Google Pay and Apple Pay successfully into your application via the Tweed checkout modal.


# AML & KYC Policy Overview

**1. KYC Requirements:**

* **Single Transaction:** We require Know Your Customer (KYC) verification for any single transaction exceeding $3,000.
* **Cumulative Transactions:** KYC verification is also mandatory when a user's cumulative transaction amount exceeds $10,000 over their lifetime.

**2. Transaction Monitoring:**

* **Stripe Radar:** We employ Stripe Radar for real-time fraud detection, helping us identify and prevent fraudulent transactions before they occur.

**3. Wallet Scanning:**

* **Chainalysis Integration:** All user wallets are continuously scanned using Chainalysis, a leading blockchain analysis tool. We block any transactions originating from wallets that are flagged with a medium or higher risk according to Chainalysis' default risk ratings. This helps us ensure that we are not inadvertently facilitating any illegal or high-risk activities.

By implementing these measures, we ensure a robust compliance framework that protects our platform and users from potential financial crimes while adhering to international AML regulations.


# Dynamic Token Amount


# Marketplace Integration


# Tweed SDKs

Libraries and  tools for utilizing your tweed integration

<figure><img src="https://2034179314-files.gitbook.io/~/files/v0/b/gitbook-x-prod.appspot.com/o/spaces%2FgQyCg5IN7Cv6AnUUpGl2%2Fuploads%2Fpn9S4ZdGsoZcQSMgieca%2Fsdk.png?alt=media&amp;token=1a52f082-9db6-4527-b546-a3730e966bf3" alt=""><figcaption></figcaption></figure>

Tweed provides comprehensive web client SDKs that encompass all the features and products Tweed offers. These SDKs enable native wallet creation within your platform, leverage Tweed's OAuth provider for seamless app access management, and integrate solutions to offer your application wallet-based and social authentication.

Our SDKs support a wide range of web integrations. For framework-based projects, opt for our React, Next.js or Vue integrations.  For vanilla-js environments such as WordPress, use the core-js integration. Additionally, Tweed SDKs are designed for effortless integration with popular web3 libraries like ethers and Wagmi, right out of the box.

<table data-view="cards"><thead><tr><th></th><th></th><th data-type="content-ref"></th><th data-hidden data-card-cover data-type="files"></th></tr></thead><tbody><tr><td><strong>core-js</strong></td><td>WordPress<br>plain HTML/JavaScript projects</td><td><a href="/developer-tools/tweed-sdks/core-js">core-js</a></td><td><a href="https://2034179314-files.gitbook.io/~/files/v0/b/gitbook-x-prod.appspot.com/o/spaces%2FgQyCg5IN7Cv6AnUUpGl2%2Fuploads%2FGMULkcq612bhurHjjRyy%2Fjs.png?alt=media&amp;token=3c59b2b8-1232-49d5-aa83-e70d07d37784">js.png</a></td></tr><tr><td><strong>core-react</strong></td><td>for react based projects</td><td><a href="/developer-tools/tweed-sdks/core-react">core-react</a></td><td><a href="https://2034179314-files.gitbook.io/~/files/v0/b/gitbook-x-prod.appspot.com/o/spaces%2FgQyCg5IN7Cv6AnUUpGl2%2Fuploads%2FusK8kRqPYUREkUl6L3SC%2Freact.png?alt=media&amp;token=bff9fc45-0e5c-4ac0-923f-40e1d3080e3f">react.png</a></td></tr><tr><td><strong>core-vue</strong></td><td>for vue based projects</td><td><a href="/developer-tools/tweed-sdks/core-vue">core-vue</a></td><td><a href="https://2034179314-files.gitbook.io/~/files/v0/b/gitbook-x-prod.appspot.com/o/spaces%2FgQyCg5IN7Cv6AnUUpGl2%2Fuploads%2FYFDDkKDckxUNtHjngrbu%2Fvue.png?alt=media&amp;token=bbfcc584-771d-4e54-8438-7a15f38b2500">vue.png</a></td></tr><tr><td><strong>wagmi connector</strong></td><td>for wagmi based projects</td><td><a href="/developer-tools/external-integrations/wagmi-connector">Wagmi connector</a></td><td><a href="https://2034179314-files.gitbook.io/~/files/v0/b/gitbook-x-prod.appspot.com/o/spaces%2FgQyCg5IN7Cv6AnUUpGl2%2Fuploads%2FmkTWGyA4SC2plfqTfqVu%2Fwagmi.png?alt=media&amp;token=e496f4cf-c752-4f32-ac6e-b073b61e4824">wagmi.png</a></td></tr><tr><td></td><td></td><td></td><td></td></tr></tbody></table>

<br>


# core-react

tweed React SDK

{% hint style="success" %}
Fully compatible with  [React v18](https://18.react.dev/) and offers complete support for [TypeScript](https://www.typescriptlang.org/)
{% endhint %}

<figure><img src="https://2034179314-files.gitbook.io/~/files/v0/b/gitbook-x-prod.appspot.com/o/spaces%2FgQyCg5IN7Cv6AnUUpGl2%2Fuploads%2FBIBflD18cvvFiaXObRxq%2Freact.png?alt=media&amp;token=f3a244a6-bfa9-41a2-bd3b-b45f0723c325" alt="react logo"><figcaption></figcaption></figure>

### Install

Install by package manager, install the [paytweed/core-react](https://www.npmjs.com/package/@paytweed/core-react) from the [npm public registry](https://www.npmjs.com/).

```bash
npm i @paytweed/core-js
```

{% embed url="<https://www.npmjs.com/package/@paytweed/core-react>" %}

### Setup

{% hint style="info" %}
Ensure you have an application set up on the tweed [dashboard](https://dashboard.paytweed.com/)
{% endhint %}

### Tweed Provider

Use the Tweed provider as a context for your React app. Wrap your application with the Tweed provider to enable access to the Tweed hook throughout your project. Make sure to pass the Tweed provider your applicationId and the list of chains you will be using in your project.

<details>

<summary>&#x3C;TweedProvider></summary>

```tsx
import { Network, TweedProvider } from "@paytweed/core-react";

function App() {
  return (
    <>
      <TweedProvider
        applicationId="YOUR_APP_ID"
          options={{
          chains: [Network.POLYGON, Network.ETHEREUM]
          }}
      >
        <HomePage />
      </TweedProvider>
```

***

**Hook parameters**

* [**applicationId**](#user-content-fn-1)[^1] <mark style="color:red;">REQUIRED</mark> <mark style="color:blue;">string</mark>
* **options** optional <mark style="color:blue;">object</mark>\
  &#x20;  [**chains**](#user-content-fn-2)[^2] optional <mark style="color:blue;">array</mark> \
  &#x20;  [**mode**](#user-content-fn-3)[^3] optional <mark style="color:blue;">string</mark>\
  &#x20;  [**rpcMap**](#user-content-fn-4)[^4] optional <mark style="color:blue;">object</mark>

</details>

### Hooks

<table data-view="cards"><thead><tr><th></th><th></th><th data-type="content-ref"></th><th data-hidden data-card-cover data-type="files"></th><th data-hidden data-card-target data-type="content-ref"></th></tr></thead><tbody><tr><td><strong>useAuth</strong></td><td>Manage user authentication with functions such as <code>connect</code>, <code>logout</code>, and retrieve access token.</td><td><a href="/developer-tools/tweed-sdks/core-react/useauth">useAuth</a></td><td></td><td><a href="/developer-tools/tweed-sdks/core-react/useauth">useAuth</a></td></tr><tr><td><strong>useTweed</strong></td><td>Manage your Tweed SDK integration using the <code>useTweed</code> hook, which includes the <code>setPaletteMode</code> function and the SDK's <code>loading</code> state.</td><td><a href="/developer-tools/tweed-sdks/core-react/usetweed">useTweed</a></td><td></td><td><a href="/developer-tools/tweed-sdks/core-react/usetweed">useTweed</a></td></tr><tr><td><strong>useWeb3</strong></td><td>This hook is your gateway to the Web3 world. Use it to obtain the <code>ethereumProvider</code> and begin interacting with the blockchain, such as signing transactions.</td><td><a href="/developer-tools/tweed-sdks/core-react/useweb3">useWeb3</a></td><td></td><td><a href="/developer-tools/tweed-sdks/core-react/useweb3">useWeb3</a></td></tr></tbody></table>

[^1]: Your application-id

[^2]: Use the `Network` enum to set the chains you want to use in your application.

[^3]: choose between light and dark appearance use the `PaletteMode` type

[^4]: in case you want to use a different RPC


# useAuth

Manage user authentication with functions such as connect, logout, and retrieve access token.

### Connect Users

Use the `connect()` function to handle user sign-ups and sign-ins. When a user signs up, a wallet is created for them behind the scenes and becomes immediately available upon completion of the sign-up process. To modify the login options, simply visit the tweed.

<details>

<summary>connect ()</summary>

```tsx
import { useAuth } from "@paytweed/core-react";

const { connect } = useAuth()
```

**Returns**

This method returns a `Promise` that resolves with a string representing oAuth access token

</details>

### Logout users

To logout users from the application, call the logout function.

<details>

<summary>logout ()</summary>

```tsx
import { useAuth } from "@paytweed/core-react";

const { logout } = useAuth()
```

</details>

### Get user access token

Get the user access token ([JWT](https://jwt.io/))

<details>

<summary>accessToken</summary>

```tsx
import { useAuth } from "@paytweed/core-react";

const { accessToken } = useAuth()
```

**Returns**

This method returns a string represent the user [JWT](https://jwt.io/)

</details>

### Verify if the user is logged in

<details>

<summary>isAuthenticated</summary>

```tsx
import { useAuth } from "@paytweed/core-react";

const { isAuthenticated } = useAuth()
```

**Returns**

This method returns true if the user is authenticated and false if they are not.

</details>


# useWallet

Manage the user's wallet, including secure access to their mnemonic

### Export mnemonic

{% hint style="info" %}
A mnemonic is a sequence of words that securely represents the user's wallet private key, allowing them to back up and restore access to their wallet.
{% endhint %}

Use the `getPrivateKey()` function to display a widget where the user can retrieve the mnemonic for their wallet.

<details>

<summary>getPrivateKey ()</summary>

```tsx
import { useWallet } from "@paytweed/core-react";

const { getPrivateKey } = useWallet()
```

</details>


# useTweed

Manage your Tweed SDK integration using the useTweed hook, which includes the setPaletteMode function and the SDK's loading state.

### Set palette mode

The tweed widgets SDK offers both dark and light modes. You can select which one to use with this function.

<details>

<summary>setPaletteMode()</summary>

```tsx
import { useTweed } from "@paytweed/core-react";

const { setPaletteMode } = useTweed()

    setPaletteMode((mode) =>
        mode === "light" ? "dark" : "light",
      )
```

**Method parameters**

paletteMode <mark style="color:red;">REQUIRED</mark>   <mark style="color:blue;">"dark" | "light"</mark>

</details>


# usePayments

Integrate Tweed Payments into your application and start selling NFTs and tokens effortlessly using a  usePayments hook.

### Checkout widget

Display Tweed's token and NFT widget anywhere in your application by simply calling the `checkoutIntent` function and providing the item's ID.

<details>

<summary>checkoutIntent()</summary>

```tsx
import { usePayments } from "@paytweed/core-react";

const { checkoutIntent } = usePayments();

await checkoutIntent({
  itemId: <ITEM_ID>,
});
```

**Method parameters**

itemId <mark style="color:red;">REQUIRED</mark>   string

toAddress *Optional*   string<br>

</details>


# useWeb3

This hook is your gateway to the Web3 world. Use it to obtain the ethereumProvider and begin interacting with the blockchain, such as signing transactions.

### Ethereum Provider | [**EIP-1193**](https://eips.ethereum.org/EIPS/eip-1193)

The Ethereum Provider acts as a bridge for Web3 libraries designed for EVM chains, such as [EthersJS](https://eips.ethereum.org/EIPS/eip-1193) and [Web3JS](https://docs.web3js.org/guides/web3_providers_guide/#injected-provider). For example, integrating Tweed with a dApp built using EthersJS is straightforward and requires only three lines of code.\
implements the `chainChanged` functionality to support the EVMs that are supported by the tweed infrastructure.

<details>

<summary>getEthereumProvider()</summary>

```tsx
import { useWeb3 } from "@paytweed/core-react";

const { getEthereumProvider } = useWeb3();

const provider = getEthereumProvider(Network.ETHEREUM_SEPOLIA)
```

**Method parameters**

[**chain**](#user-content-fn-1)[^1] <mark style="color:red;">REQUIRED</mark>  <mark style="color:blue;">string</mark>

</details>

[^1]: Use the `Network` enum to set the chain of the provider


# core-js

tweed javascript SDK

{% hint style="success" %}
Fully compatible with JavaScript and TypeScript
{% endhint %}

<figure><img src="https://2034179314-files.gitbook.io/~/files/v0/b/gitbook-x-prod.appspot.com/o/spaces%2FgQyCg5IN7Cv6AnUUpGl2%2Fuploads%2FjAsGv2btoenMazAd9NE4%2Fjs.png?alt=media&amp;token=a5ebc24d-73b3-44a8-8516-ff2fb6c0cf6a" alt="js logo"><figcaption></figcaption></figure>

### Install

Install by package manager, install the [paytweed/core-js](https://www.npmjs.com/package/@paytweed/core-js) from the [npm public registry](https://www.npmjs.com/).

```bash
npm i @paytweed/core-js
```

{% embed url="<https://www.npmjs.com/package/@paytweed/core-js>" %}

### Setup

{% hint style="info" %}
Ensure you have an application set up on the tweed [dashboard](https://dashboard.paytweed.com/)
{% endhint %}

Import the `TweedClient` from the tweed core-js SDK initial using `create()` function.\
Use the [`applicationId`](#user-content-fn-1)[^1] from the management console.

<details>

<summary><code>TweedClient.create()</code></summary>

```typescript
import { Network, TweedClient } from "@paytweed/core-js";

const chains = [Network.ETHEREUM, Network.POLYGON];
const appId = "07a0835b-3c76-4572-8eae-66f347c1b77c";

const tweed = await TweedClient.create(appId, { chains });
```

***

**Method parameters**

* [**applicationId**](#user-content-fn-2)[^2] <mark style="color:red;">REQUIRED</mark> <mark style="color:blue;">string</mark>&#x20;
* **options** optional <mark style="color:blue;">object</mark>\
  &#x20;  [**chains**](#user-content-fn-3)[^3] optional <mark style="color:blue;">array</mark> \
  &#x20;  [**mode**](#user-content-fn-4)[^4] optional <mark style="color:blue;">string</mark>\
  &#x20;  [**rpcMap**](#user-content-fn-5)[^5] optional <mark style="color:blue;">object</mark>

***

**Returns**

This method returns a `Promise` that resolves with a string representing oAuth access token

</details>

### Connect Users

Use the `connect()` function to handle user sign-ups and sign-ins. When a user signs up, a wallet is created for them behind the scenes and becomes immediately available upon completion of the sign-up process. To modify the login options, simply visit the tweed [dashboard](/developer-tools/management-dashboard/create-application).

<details>

<summary><code>tweed.connect()</code></summary>

```javascript
const accessToken = await client.connect();
```

**Returns**

This method returns a `Promise` that resolves with a string representing oAuth access token

</details>

### Logout users

To logout users from the application, call the logout function.

<details>

<summary><code>tweed.logout()</code></summary>

```javascript
await client.logout()
```

</details>

### Ethereum Provider | [**EIP-1193**](https://eips.ethereum.org/EIPS/eip-1193)

The Ethereum Provider acts as a bridge for Web3 libraries designed for EVM chains, such as [EthersJS](https://eips.ethereum.org/EIPS/eip-1193) and [Web3JS](https://docs.web3js.org/guides/web3_providers_guide/#injected-provider). For example, integrating Tweed with a dApp built using EthersJS is straightforward and requires only three lines of code.\
implements the `chainChanged` functionality to support the EVMs that are supported by the tweed infrastructure.

<details>

<summary><code>tweed.getEthereumProvider()</code></summary>

```typescript
tweedProvider = await tweed.getEthereumProvider(Network.ETHEREUM_SEPOLIA);
```

**Method parameters**

* [**chain**](#user-content-fn-6)[^6] <mark style="color:red;">REQUIRED</mark>  <mark style="color:blue;">string</mark>

</details>

### Export Mnemonic

A mnemonic is a sequence of words that securely represents the user's wallet private key, allowing them to back up and restore access to their wallet.\
Use the getPrivateKey() function to display a widget where the user can retrieve the mnemonic for their wallet.

<details>

<summary>getPrivateKey()</summary>

```javascript
await client.getPrivateKey()
```

</details>

### Set palette mode

The tweed widgets SDK offers both dark and light modes. You can select which one to use with this function.

<details>

<summary><code>tweed.setPaletteMode()</code></summary>

```typescript
client.setPaletteMode((mode) =>
    mode === "light" ? "dark" : "light",
  );
```

**Method parameters**

* paletteMode <mark style="color:red;">REQUIRED</mark>   <mark style="color:blue;">"dark" | "light"</mark>

</details>

[^1]: Your application-id is required when calling this function, as it identifies your application to tweed.

[^2]: Your application-id

[^3]: Use the `Network` enum to set the chains you want to use in your application.

[^4]: choose between light and dark appearance use the `PaletteMode` type

[^5]: in case you want to use a different RPC

[^6]: Use the `Network` enum to set the chain of the provider


# core-vue

tweed vue SDK

<figure><img src="https://2034179314-files.gitbook.io/~/files/v0/b/gitbook-x-prod.appspot.com/o/spaces%2FgQyCg5IN7Cv6AnUUpGl2%2Fuploads%2FMPdqti5fyZaOJLJCQ9C0%2Fvue.png?alt=media&amp;token=bd0568d3-e52f-4c15-9634-6f90b96b0775" alt="vue logo"><figcaption></figcaption></figure>

{% embed url="<https://www.npmjs.com/package/@paytweed/core-vue>" %}


# Payments SDKs (v1)

tweed's payment SDK build to giving you the best way sell fungible and non-fungible tokens in your platform

{% hint style="danger" %}
We are migrating to V2 soon, and all the payments SDK for V1 will become deprecated

in V2 you don't need to have a backend for your application - all the catalog management is performed through our [Management Dashboard](/developer-tools/management-dashboard) / [API](/developer-tools/api/api-v2)
{% endhint %}

Our Payment SDKs offer a streamlined and straightforward implementation of our payment solutions, serving as versatile building blocks that cater to a wide range of use cases and scenarios.

{% hint style="success" %}
Before diving into implementing our payment solutions, get in touch with us to discover the perfect fit for your needs and receive an API key to bring your web3 integration to life.
{% endhint %}

{% hint style="info" %}
&#x20;We recommend using our [quick integration guides](/getting-started/token-checkout-or-payments) for step-by-step instructions on seamlessly implementing our payment solution into your application.
{% endhint %}

<table data-view="cards"><thead><tr><th></th><th></th><th data-hidden data-card-target data-type="content-ref"></th></tr></thead><tbody><tr><td>F<strong>rontend SDKs</strong></td><td>Frontend SDKs for a wide range of frameworks, including React, Next.js, React Native, and vanilla JS + HTML.</td><td><a href="/developer-tools/tweed-sdks/payments-sdks-v1/frontend-sdks-payments">Frontend SDKs (Payments)</a></td></tr><tr><td><strong>Backend SDK</strong></td><td>Take a look at our backend SDKs and implement them in your backend, whether you're using Express.js, NestJS, or any other framework.</td><td><a href="/developer-tools/tweed-sdks/payments-sdks-v1/backend-sdk-payments">Backend SDK (Payments)</a></td></tr></tbody></table>


# Frontend SDKs (Payments)

This page compliments the [Basic Payment Integration](/getting-started/token-checkout-or-payments/legacy-token-checkout/basic-checkout-integration) guide.\
Here you will find additional information regarding functions used in the Payments Integration Guide.

## Buy with fiat[​](https://docs.paytweed.com/frontend-sdk/javascript/on-chain-functions/#buy-with-fiat) <a href="#buy-with-fiat" id="buy-with-fiat"></a>

Depending on whether your use case requires a Token or NFT checkout,\
The path to the function will be different:

* For **NFT** checkout use:\
  `frontendSDK.nft.buyWithFiat`\
  With the `nftId` parameter.
* For **Token** checkout use:\
  `frontendSDK.token.buyWithFiat`\
  With the `tokenId` parameter.

**The synopsis for both functions almost identical, with the \`tokenId\` / \`nftId\` being the only difference:**

```
type buyWithFiat = (payload: {
    nftId: string;
    data: Record<string, any> | undefined;
    toWalletAddress: string | undefined;
    customMintParams: Record<string, any> | undefined;
    callbacks: WidgetCallbacks<any> | undefined;
    settings: WidgetSettings | undefined;
}): Promise<string>
```

<table><thead><tr><th width="234" align="center">Field Name</th><th>Description</th></tr></thead><tbody><tr><td align="center"><p><code>nftID</code></p><p>or<br><code>tokenID</code></p></td><td>The ID of the <strong>NFT</strong> or <strong>Token</strong>, as defined by your implementation of the Tweed Backend Payment SDK.<br>(Read more about the: <a href="/developer-tools/tweed-sdks/payments-sdks-v1/backend-sdk-payments">Backend side of the Payments integration</a>)</td></tr><tr><td align="center">data</td><td>Your custom data that will be passed to Tweed, and later will be sent to you in the Webhook(s).</td></tr><tr><td align="center">toWalletAddress</td><td>The wallet address that the NFT will be send to, If the wallet was created by tweed the wallet address will be populated automatically.</td></tr><tr><td align="center">customMintParams</td><td>A key-value set of parameters that will be passed into your on-chain smart contract. <strong>Needs to match your contract's ABI!</strong></td></tr><tr><td align="center">callbacks</td><td>You may define handlers for the following widget events:<br><code>onSuccess</code>, <code>onError</code>, <code>onClose</code></td></tr></tbody></table>

**Example of usage**[**​**](https://docs.paytweed.com/frontend-sdk/javascript/on-chain-functions/#example-of-usage-8)

```typescript
try {
      sdkv1.nft.buyWithFiat({
        nftId,
        toWalletAddress,
        customMintParams: {},
        data: {},
        callbacks: {
          onSuccess: (data) => {
            console.log('[buyNft] Freemint success!', data)
          },
          onError: (error) => {
            console.error('[buyNft] Freemint error!', error)
          },
          onClose,
        },
        settings: {
          
        }
      })
    } catch (err) {
      console.error(err)
    }
```


# Backend SDK (Payments)

This page compliments the [Basic Payment Integration](/getting-started/token-checkout-or-payments/legacy-token-checkout/basic-checkout-integration) guide.\
Here you will find additional information regarding functions used in the Payments Integration Guide.

***

{% hint style="info" %}
**Note:** We show here an example for NFT checkout,\
but its the same process for Token checkout as well,\
the only difference being the name of the function and the `id` parameter.
{% endhint %}

## The \`getNftPurchaseData\` callback function[​](https://docs.paytweed.com/frontend-sdk/javascript/on-chain-functions/#buy-with-fiat) <a href="#buy-with-fiat" id="buy-with-fiat"></a>

In this function you are expected to define the transaction parameters, and define your desired settlement type.\
(For more info about settlement types see: [Flow of Funds](/getting-started/token-checkout-or-payments/legacy-token-checkout/features/flow-of-funds))

For each settlement type you will have to adjust your `getNftPurchaseData` parameters accordingly:

```typescript
// Common parameters for all settlement types
const nftCheckoutCommon = {
  title: 'Tweed Demo NFT',
  fiatCurrencyId: 'USD',
  contractAddress: DEMO_NFT_CONTRACT_ADDRESS,
  chain: 'polygonAmoy',
  description: "Non-fungible token for demonstration of Tweed's capabilities",
  tokenUri: 'https://paytweed-assets.s3.amazonaws.com/pinky.png' // A simple PNG for the NFT on Tweed's widget
}

const nftCheckoutVariants: Record<string, NftPurchaseBackendPayload> = {
  'demo-freemint': {
    ...nftCheckoutCommon,
    nftId: 'demo-freemint',
    priceInCrypto: '0', // For free mint
    tokenContractAddress: undefined, // For free mint
    abi: DEMO_NFT_CONTRACT_ABI_FREE,
  },
  'demo-paidmint-native': {
    ...nftCheckoutCommon,
    nftId: 'demo-paidmint-native',
    priceInCrypto: String(1e16), // For native settlement -- set price to 0.01 MATIC
    abi: DEMO_NFT_CONTRACT_ABI_PAID_NATIVE,
  },
  'demo-paidmint-erc20': {
    ...nftCheckoutCommon,
    nftId: 'demo-paidmint-erc20',
    priceInCrypto: String(100e18), // For ERC20 settlement -- 100 fake USDC token
    tokenContractAddress: FAKE_USDC_CONTRACT_ADDRESS, // For ERC20 settlement -- fake USDC token address
    abi: DEMO_NFT_CONTRACT_ABI_PAID_ERC20,
  },
}
```

{% hint style="info" %}
*See source repository for full example:* [*https://github.com/paytweed/demo-v2-next/blob/main/services/tweed.service.ts*](https://github.com/paytweed/demo-v2-next/blob/main/services/tweed.service.ts)
{% endhint %}

Note how we provide different parameters based on the type of the settlement.

The `nftId` should correlate to the `nftId` passed from the frontend in the `buyWithFiat` function call.

#### Correctly specifiying your ABI:

The `abi` parameter should contain the name of the function and its arguments declerations,\
similar to the following example: \
`safeMint(sendTo address, tokenId uint256, tokenUri string)`. \
\
The arguments needs to get populated into the`customMintParams` object like so:

```javascript
customMintParams : {
    sendTo: <THE_WALLET_ADDRESS_VAR>,
    tokenId: <YOUR_TOKEN_ID_VAR>,
    tokenUri: <YOUR_TOKEN_URI_VAR>
}
```


# How to set up your smart contract for Tweed

### Our claimer[ ](#user-content-fn-1)[^1]needs to have a minter role in the contract.

Your smart contract have to allow Tweed's "claimer" smart contract to mint assets (Tokens or NFTs).

### In case you want to get settled in native crypto currency, the mint function needs to be payable.

If you expect Tweed to settle (pay you) with native cryptocurrency (ETH, MATIC, BASE, etc..),\
then the mint function in your contract has to be `payable` thus allowing Tweed to send crypto directly along with the mint request.

Your contract will be able to validate that it got the crypto funds.

[^1]:


# Tezos chain considerations

1. In the `abi` parameter of the `NFT_INFO` only the function name is needed without the list of params
2. The `customMintParams` parameter will hold the list of arguments the function in the `abi` gets and translate them to their michelson representation
3. For ex:

```javascript
abi: "buy_nft"
customMintParams: {
    wallet_address: <WALLET_ADDRESS>,
    nft_uri: <NFT_URI>
}
```


# Management Dashboard


# Create platform

Build a platform for your company where you can invite your colleagues and team members to collaboratively create and manage your applications in real-time via the Tweed dashboard.

1. Create an account - Sign up for Tweed Dashboard using your Google account or your email and password.
2. Register your company information - Simply fill out the form details and click "Let's Go".

<figure><img src="https://2034179314-files.gitbook.io/~/files/v0/b/gitbook-x-prod.appspot.com/o/spaces%2FgQyCg5IN7Cv6AnUUpGl2%2Fuploads%2FzfY7N11L54p97wGfOBBP%2Fsuccess%20-_%20user%20information%201440.png?alt=media&amp;token=acac28f6-64b1-4263-a151-e060022c4d7f" alt="tweed management console"><figcaption><p><a href="https://dashboard.paytweed.com/">https://dashboard.paytweed.com</a></p></figcaption></figure>

Once the platform is created, you can create your first application.

{% content-ref url="/pages/LFlugnKrnAoOZaAsvuSn" %}
[Create application](/developer-tools/management-dashboard/create-application)
{% endcontent-ref %}


# Manage Team

After creating your platform you may invite members to your platform.

The invited members will have to accept the invitation and log in with the same email they were invited by.

{% hint style="info" %}
**Note:** Admin cannot remove himself if he is the **last** admin.
{% endhint %}

<figure><img src="https://2034179314-files.gitbook.io/~/files/v0/b/gitbook-x-prod.appspot.com/o/spaces%2FgQyCg5IN7Cv6AnUUpGl2%2Fuploads%2F2g24Flkfc1YHUSWp4wKG%2Fteam.png?alt=media&amp;token=e0ce95c0-a1aa-4e57-a43a-05fb01d31bcb" alt=""><figcaption><p>Team members</p></figcaption></figure>


# Create application

You have the ability to generate several applications for your company and oversee them all from a single location.

Each application on the dashboard can possess unique settings and behavior.

1. Navigate to the "Applications" section on the left panel, then proceed to click on the "Create" button.
2. Enter the name of your new app and proceed to click on the "Create" button.\
   A new application will be generated for you immediately.

<figure><img src="https://2034179314-files.gitbook.io/~/files/v0/b/gitbook-x-prod.appspot.com/o/spaces%2FgQyCg5IN7Cv6AnUUpGl2%2Fuploads%2Fc9UcXf8L10RO9ZOCfd0h%2Fapplications%20(has%20apps)%201921.png?alt=media&amp;token=6684cd93-d85f-4671-a2a8-0b37e7490911" alt=""><figcaption><p>Applications</p></figcaption></figure>

Now, you can copy the Application ID and start utilizing it with our SDKs in the app you are constructing.

### Next steps:

<table data-view="cards"><thead><tr><th></th><th></th><th data-type="content-ref"></th></tr></thead><tbody><tr><td><strong>Integrate Frontend SDK in your application</strong></td><td>Start by integrating the Frontend SDK in your application to utilize payments and wallets</td><td><a href="/developer-tools/tweed-sdks">Tweed SDKs</a></td></tr><tr><td><strong>Create Wallets for Users</strong></td><td>Establish wallets for your users by enabling and configuring certain products, such as WAAS, within your new application.</td><td><a href="/getting-started/embedded-wallets-or-waas">Embedded Wallets | WaaS</a></td></tr><tr><td><strong>Update Appearance</strong></td><td>Modify the appearance by adjusting Tweed widgets and modals, like login or sign transaction, to align with your own application design.</td><td><a href="/developer-tools/management-dashboard/create-application/ui-customization">UI Customization</a></td></tr></tbody></table>


# UI Customization

You may configure the appearance of your wallet widgets as you like.

Every application can have a separate design configuration.

<figure><img src="https://2034179314-files.gitbook.io/~/files/v0/b/gitbook-x-prod.appspot.com/o/spaces%2FgQyCg5IN7Cv6AnUUpGl2%2Fuploads%2F8x1fcJNAvldD2R4eTHEw%2Fapplication%20-%20customization%20(light%20mode)%201440.png?alt=media&amp;token=91b753ba-88fe-4321-842f-fafddf361e9e" alt=""><figcaption><p>Wallet-as-a-Service widget customization</p></figcaption></figure>


# Webhooks

The Webhooks feature enables you to receive real-time events directly from our server.\
You can configure each webhook to subscribe to specific events of your choice.\
When an event occurs, we will send an HTTP POST request to your specified URL.

### How to add a Webhook

1. Navigate to the Webhooks page in the Dashboard: <https://dashboard.paytweed.com/webhooks>
2. Click on `+ Add Webhook`
3. Enter your endpoint URL (the https\:// prefix will be added automatically, as we only support secure connections). Ensure your endpoint is publicly accessible so our server can send requests to it.
4. For enhanced security, you can specify a signing secret. \[See [#signing-secret](#signing-secret "mention").]
5. Select events that this Webhook would be listening to (at least 1).

**Tip:** You may create multiple Webhooks one for each event, or one webhook listening to all the events that interest you.

### Signing Secret

The signing secret is a shared string used to verify that incoming webhook requests are authentic and have not been tampered with or spoofed. This ensures that the request is genuinely coming from our server. Make sure the signing secret you provide is stored securely and encrypted in your platform (for example, using AWS secret manager).

We use HMAC-based shared-key authentication for this purpose. The signing process involves generating a signature using the shared key and comparing it with the one included in the webhook request.

```typescript
// TypeScript

const signingSecret: string = '<the secret>';
const algorithm = 'sha256';
const result = `${algorithm}=${createHmac(algorithm, signingSecret)
    .update(payload)
    .digest('hex')}`

// >>> console.log(result)
// sha256=4355a46b19d348dc2f57c046f8ef63d4538ebb936000f3c9ee954a27460dd865
```

We then attach the `result` in the request headers under the `X-Hub-Signature-256` header:\
\
Example header:

```
X-Hub-Signature-256: sha256=4355a46b19d348dc2f57c046f8ef63d4538ebb936000f3c9ee954a27460dd865
```

Later on your end, you may validate by using the same implementation (hashing the HTTP request body) and compare the result with the header.

For increased security use a cryptographically-secure string comparison function like: [`crypto.timingSafeEqual`](https://nodejs.org/dist/v6.17.1/docs/api/crypto.html#crypto_crypto_timingsafeequal_a_b)

Read more: <https://docs.github.com/en/webhooks/using-webhooks/validating-webhook-deliveries>

### Headers sent in a webhook call

Those are the headers sent in each webhook call:

```
'X-Tweed-Hook-ID': string // a unique id of the webhook
'X-Tweed-Event': string // the event identifier
'X-Tweed-Delivery': string // for replay attacks prevention. client can ignore the same delivery id if already processed
'X-Hub-Signature-256'?: string // signature of the payload + secret
```

#### `X-Tweed-Hook-ID`

Each webhook you create on the platform is assigned a unique identifier, which remains consistent across all requests for that specific webhook. This identifier is included in the request headers to help you differentiate between webhooks if you manage multiple endpoints.

This can help you identify which webhook triggered the request. Ensures you can route or handle requests appropriately based on the webhook's unique ID.  Once a webhook is created, its identifier remains unchanged and is included in every request associated with that webhook. Make sure your system logs or processes this header to track and manage incoming webhook events effectively.

#### `X-Tweed-Event`

Each webhook request includes a header named `X-Tweed-Event`, which contains the unique identifier for the specific event being reported. This allows you to track and manage individual events efficiently.

#### `X-Tweed-Delivery`

The X-Tweed-Delivery header contains a unique identifier for each webhook delivery. This ensures idempotency and helps prevent replay attacks by allowing clients to identify and ignore duplicate requests. Use the delivery ID to make event handling idempotent, ensuring the same event is not applied multiple times.

`X-Hub-Signature-256`

The X-Hub-Signature-256 header contains the cryptographic signature of the webhook payload, generated using the HMAC-SHA256 algorithm with your shared secret. This header allows you to verify the authenticity and integrity of the webhook request. \[See [#signing-secret](#signing-secret "mention")]

### Available Events

{% content-ref url="/pages/kx0ZQnNdx9t3xxQWcmux" %}
[Checkout Webhooks](/developer-tools/webhooks/checkout-webhooks)
{% endcontent-ref %}


# Checkout Webhooks

## Checkout Status Updated

Body (payload) of the POST request:

```json
{
    type: "CHECKOUT_STATUS_UPDATED";
    data: {
        checkoutData: {
            checkoutId: string;
            quantity: number;
            price: number;
            customParams?: object;
        };
        status: CheckoutStatus;
        paymentData?: {
            status: string;
            amount: number;
            created: number;
            currency: string;
            livemode: boolean;
            metadata?: {
                chain_id?: string;
                request_id?: string;
                transaction_hash?: string;
            };
            paymentMehod?: {
                billingDetails?: object;
                card?: object;
                ...
            };
        };
    };
}
```

Example

```json
{
  "type": "CHECKOUT_STATUS_UPDATED",
  "data": {
    "checkoutData": {
      "checkoutId": "aa96176f-1136-4716-9213-8f5ec43ffa81",
      "quantity": 10,
      "price": 1,
      "customParams": {
        ...
      }
    },
    "status": "DONE",
    "paymentData": {
      "status": "succeeded",
      "amount": 1055,
      "created": 1738705790,
      "currency": "usd",
      "livemode": true,
      "metadata": {
        "chain_id": "c7e243e4-e6b2-487c-99a1-8d36d49046bc",
        "request_id": "68f83be4-4c93-44c8-925c-1052bd7fbced",
        "transaction_hash": "0xe93cd08ec2778c5490daea7ee59240f4bdbaa883e8024eec3749ecb2cb4d11e9"
      },
      "paymentMethod": {
        "billingDetails": {
          "address": {
            ...
          },
          "email": "tesetest@test.com",
        },
        "card": {
          "brand": "mastercard",
          "checks": {
            "address_line1_check": null,
            "address_postal_code_check": null,
            "cvc_check": "pass"
          },
          "country": "IL",
          "display_brand": "mastercard",
          "exp_month": 10,
          "exp_year": 2030,
          "fingerprint": "...",
          "funding": "credit",
          "generated_from": null,
          "last4": "1234",
          "networks": {
            "available": [
              "mastercard"
            ],
            "preferred": null
          },
          "regulated_status": "unregulated",
          "three_d_secure_usage": {
            "supported": true
          },
          "wallet": null
        },
        "created": 1738705842,
        "type": "card"
      },
      "receiptEmail": "test1234@test.com"
    }
  }
}
```

### <mark style="color:green;">CheckoutStatus</mark>

#### CREATED

indicates that a checkout intent was submitted to Tweed and was created

#### PERFORM\_CHECKOUT\_SUBMITTED

indicates that the end user submitted the checkout successfuly

#### TRANSACTION\_BROADCAST

indicates that the transaction was broadcasted to the blockchain

#### DONE

indicates that the checkout process was successful and the user received the token to it's wallet

#### FAILED

indicates that the checkout process failed

#### FAILED\_AFTER\_TX\_COMPLETED

indicates that the checkout process failed after the transaction was already completed on chain


# API


# API (V1)

Utilize this robust API to effectively manage tokens for sale within your application.

## Payments

{% hint style="success" %}
**Tailored for Marketplace Integration**

offering you the ability to manage a fully functional marketplace. Empower your users to add their own NFTs and tokens by deploying their own smart contracts.&#x20;
{% endhint %}

Leverage this API to seamlessly enable token sales with our token checkout.\
To access the API, simply attach a bearer token to each request. Generate this token using the management API keys provided during onboarding.

1. **Obtain JWT Access Token**\
   To obtain a JWT access token, send a POST request to the `https://api-console.paytweed.com/auth/getAccessToken` endpoint. Include your API key and API secret in the request body. This will return a JWT access token.

{% hint style="danger" %}
Create a mechanism in your code to generate a new JWT token only when the current token has expired, rather than generating a new token for each API call.
{% endhint %}

{% tabs %}
{% tab title="TypeScript" %}

```javascript
const apiKey = 'your_api_key';
const apiSecret = 'your_api_secret';

const authEndpoint = 'https://api-console.paytweed.com/auth/getAccessToken';

const payload = {
  apiKey,
  apiSecret,
};

const response = await fetch(authEndpoint, {
  method: 'POST',
  headers: {
    'Content-Type': 'application/json',
  },
  body: JSON.stringify(payload),
});

const jwt = await response.json();
```

{% endtab %}

{% tab title="cURL" %}
{% code overflow="wrap" %}

```bash
curl --request POST --header "Content-Type: application/json" --data '{"apiKey":"<YOUR_API_KEY>","apiSecret":"<YOUR_API_SECRET>"}' https://api-console.paytweed.com/auth/getAccessToken
```

{% endcode %}
{% endtab %}
{% endtabs %}

2. For each API call you make to the `https://api-console.paytweed.com/collections` endpoint, include the JWT token in the header of your request. This ensures that the server can authenticate and authorize your requests properly.

```typescript
const headers = {
  Authorization: `Bearer ${access_token}`,
  'Content-Type': 'application/json',
};
```

### Tokens and Collections&#x20;

#### Add

Send a `POST` request to the `https://api-console.paytweed.com/collections` endpoint, including an array of objects that represent the details of the NFT collection or In-Platform Token.

**The required properties for each object are:**

<details>

<summary><code>name</code> <mark style="color:orange;background-color:yellow;">Required</mark> </summary>

Type: `String`

**Description:** The name of the NFT Collection or In-Platform Token

**Best practice:** Try to keep names short so the full name will appear in every modal

</details>

<details>

<summary><code>blockchain</code> <mark style="color:orange;background-color:yellow;">Required</mark> </summary>

Type: `String`

**Description:** The name of the blockchain associated with the NFT Collection or In-Platform Token

See all the supported blockchains in [Supported Blockchains](broken://pages/hjFlDmpeKNzDh1QIowD2).

</details>

<details>

<summary><code>contractAddress</code> <mark style="color:orange;background-color:yellow;">Required</mark> </summary>

Type: `String`

**Description:** The address of the smart contract associated with the NFT Collection or In-Platform Token

</details>

<details>

<summary><code>whitelisted</code> <mark style="color:orange;background-color:yellow;">Required</mark> </summary>

Type: `String`

**Description:** A boolean value indicating if the NFT Collection or In-Platform Token is whitelisted

</details>

<details>

<summary><code>whitelistingInfo</code> <mark style="color:orange;background-color:yellow;">Required</mark> </summary>

Type: JSON object

**Description:** to pass your whitelist information to my endpoint, format it as follows

**Example:** \
`{ "list": { "wallets": [ "0x48...0412" ] }, "emails": [ "test@test.com" ] }`

</details>

```typescript
const tokens = [
    {
      name: 'Collection 1',
      contractAddress: '0x123456789',
      blockchain: 'Ethereum',
      whitelisted: false,
      whitelistingInfo: '{}'
    },
    {...another token}]
```

#### Retrieve

To retrieve all the NFT Collections or In-Platform Tokens in your console, send a `GET` request to the `https://api-console.paytweed.com/collections` endpoint.&#x20;

The response will contain the information about all of the NFT Collections or In-Platform Tokens available.

#### Delete

To delete a specific NFT Collection or In-Platform Token, make a `DELETE` request to the `https://api-console.paytweed.com/collection/{token_Id}` endpoint, where `{token_Id}` represents the ID of the NFT Collection you want to delete.


# API (V2)

{% hint style="success" %}
Tweed v2 represents a major upgrade from version 1, designed to make integrating payments and wallet management even easier for your application. Unlike V1, where you had to manage a server infrastructure to enable these functionalities, V2 eliminates the need for that step.
{% endhint %}

**Simple Setup with No Server Required**

In v2, you can activate payments and wallet management directly through the **Tweed Management Console**. All you need to do is create a user, and from there, you gain full control over the following functionalities:

* **Catalog Management**
* **Item Management**
* **Payment Setup and Wallet Control**

You no longer have to worry about maintaining servers or complicated backend integrations. The entire process is simplified and automated to ensure a seamless experience.

**Tweed's API V2: The Power of Customization**

If you prefer more control or have custom needs, you can also manage your catalog, items, and more via **Tweed's API V2**. The API allows you to integrate directly into your application, offering flexibility and easy access to all the features of Tweed’s wallet and payment management system.


# Authorization

To interact with our API, users must authenticate their requests using a User Access Token. Follow the steps below to obtain and use a token for authorization

### Step 1: Generate a User Access Token

1. Navigate to the [User Access Token page](https://dashboard.paytweed.com/api-keys) in the Management Dashboard.
2. Click on **Create user access token**.

<figure><img src="https://2034179314-files.gitbook.io/~/files/v0/b/gitbook-x-prod.appspot.com/o/spaces%2FgQyCg5IN7Cv6AnUUpGl2%2Fuploads%2Fn8KjLwon5k6tD5NKO0MJ%2Fimage.png?alt=media&amp;token=8d7e4a4d-0474-4aec-9e60-cf8d0c3fcbfc" alt="" width="375"><figcaption></figcaption></figure>

3. The generated token will include:

* **API Key**: Your unique identifier.
* **API Secret**: Your secret key for secure access.

### Step 2: Use the Authorization Header

When making requests to the API, you must include the authorization header in the following format:

```
Authorization: Bearer <API_KEY>:<API_SECRET>
```

#### Example Request

```
GET /api/v1/resource
Authorization: Bearer abcd1234:efgh5678
```

#### Important Notes

* Keep your **API Secret** confidential and do not share it.
* The token grants access to your account and data, so store it securely.
* If your token is compromised, revoke it immediately from the User Access Token page and generate a new one.


# API reference

Tweed's API base URL is <https://api-v2.prod.paytweed.com/>

Check the resources reference for specific operations.

Updated JSON Open API Spec can be viewed [here](https://api-v2.prod.paytweed.com/api-spec.json)


# Contracts

{% openapi src="/files/BmmYPUEqSA3Beg9qdGD2" path="/v1/contracts/{contractId}" method="get" %}
[api spec.json](https://2034179314-files.gitbook.io/~/files/v0/b/gitbook-x-prod.appspot.com/o/spaces%2FgQyCg5IN7Cv6AnUUpGl2%2Fuploads%2FGrUEXrexQG7EtD1fOlmc%2Fapi%20spec.json?alt=media)
{% endopenapi %}

{% openapi src="/files/BmmYPUEqSA3Beg9qdGD2" path="/v1/contracts" method="get" %}
[api spec.json](https://2034179314-files.gitbook.io/~/files/v0/b/gitbook-x-prod.appspot.com/o/spaces%2FgQyCg5IN7Cv6AnUUpGl2%2Fuploads%2FGrUEXrexQG7EtD1fOlmc%2Fapi%20spec.json?alt=media)
{% endopenapi %}


# Add

{% openapi src="/files/BmmYPUEqSA3Beg9qdGD2" path="/v1/contracts/add" method="post" %}
[api spec.json](https://2034179314-files.gitbook.io/~/files/v0/b/gitbook-x-prod.appspot.com/o/spaces%2FgQyCg5IN7Cv6AnUUpGl2%2Fuploads%2FGrUEXrexQG7EtD1fOlmc%2Fapi%20spec.json?alt=media)
{% endopenapi %}


# Add contract function

{% openapi src="/files/BmmYPUEqSA3Beg9qdGD2" path="/v1/contracts/add-contract-function" method="post" %}
[api spec.json](https://2034179314-files.gitbook.io/~/files/v0/b/gitbook-x-prod.appspot.com/o/spaces%2FgQyCg5IN7Cv6AnUUpGl2%2Fuploads%2FGrUEXrexQG7EtD1fOlmc%2Fapi%20spec.json?alt=media)
{% endopenapi %}


# Contract

{% openapi src="/files/BmmYPUEqSA3Beg9qdGD2" path="/v1/contracts/contract/{contractId}" method="delete" %}
[api spec.json](https://2034179314-files.gitbook.io/~/files/v0/b/gitbook-x-prod.appspot.com/o/spaces%2FgQyCg5IN7Cv6AnUUpGl2%2Fuploads%2FGrUEXrexQG7EtD1fOlmc%2Fapi%20spec.json?alt=media)
{% endopenapi %}


# Payouts

{% openapi src="/files/BmmYPUEqSA3Beg9qdGD2" path="/v1/payouts/{payoutId}" method="get" %}
[api spec.json](https://2034179314-files.gitbook.io/~/files/v0/b/gitbook-x-prod.appspot.com/o/spaces%2FgQyCg5IN7Cv6AnUUpGl2%2Fuploads%2FGrUEXrexQG7EtD1fOlmc%2Fapi%20spec.json?alt=media)
{% endopenapi %}

{% openapi src="/files/BmmYPUEqSA3Beg9qdGD2" path="/v1/payouts" method="get" %}
[api spec.json](https://2034179314-files.gitbook.io/~/files/v0/b/gitbook-x-prod.appspot.com/o/spaces%2FgQyCg5IN7Cv6AnUUpGl2%2Fuploads%2FGrUEXrexQG7EtD1fOlmc%2Fapi%20spec.json?alt=media)
{% endopenapi %}


# Add

{% openapi src="/files/BmmYPUEqSA3Beg9qdGD2" path="/v1/payouts/add" method="post" %}
[api spec.json](https://2034179314-files.gitbook.io/~/files/v0/b/gitbook-x-prod.appspot.com/o/spaces%2FgQyCg5IN7Cv6AnUUpGl2%2Fuploads%2FGrUEXrexQG7EtD1fOlmc%2Fapi%20spec.json?alt=media)
{% endopenapi %}


# Payout

{% openapi src="/files/BmmYPUEqSA3Beg9qdGD2" path="/v1/payouts/payout/{payoutId}" method="delete" %}
[api spec.json](https://2034179314-files.gitbook.io/~/files/v0/b/gitbook-x-prod.appspot.com/o/spaces%2FgQyCg5IN7Cv6AnUUpGl2%2Fuploads%2FGrUEXrexQG7EtD1fOlmc%2Fapi%20spec.json?alt=media)
{% endopenapi %}


# Items

{% openapi src="/files/BmmYPUEqSA3Beg9qdGD2" path="/v1/items/{id}" method="get" %}
[api spec.json](https://2034179314-files.gitbook.io/~/files/v0/b/gitbook-x-prod.appspot.com/o/spaces%2FgQyCg5IN7Cv6AnUUpGl2%2Fuploads%2FGrUEXrexQG7EtD1fOlmc%2Fapi%20spec.json?alt=media)
{% endopenapi %}

{% openapi src="/files/BmmYPUEqSA3Beg9qdGD2" path="/v1/items/{id}" method="delete" %}
[api spec.json](https://2034179314-files.gitbook.io/~/files/v0/b/gitbook-x-prod.appspot.com/o/spaces%2FgQyCg5IN7Cv6AnUUpGl2%2Fuploads%2FGrUEXrexQG7EtD1fOlmc%2Fapi%20spec.json?alt=media)
{% endopenapi %}

{% openapi src="/files/BmmYPUEqSA3Beg9qdGD2" path="/v1/items" method="get" %}
[api spec.json](https://2034179314-files.gitbook.io/~/files/v0/b/gitbook-x-prod.appspot.com/o/spaces%2FgQyCg5IN7Cv6AnUUpGl2%2Fuploads%2FGrUEXrexQG7EtD1fOlmc%2Fapi%20spec.json?alt=media)
{% endopenapi %}


# Add

{% openapi src="/files/BmmYPUEqSA3Beg9qdGD2" path="/v1/items/add" method="post" %}
[api spec.json](https://2034179314-files.gitbook.io/~/files/v0/b/gitbook-x-prod.appspot.com/o/spaces%2FgQyCg5IN7Cv6AnUUpGl2%2Fuploads%2FGrUEXrexQG7EtD1fOlmc%2Fapi%20spec.json?alt=media)
{% endopenapi %}


# All


# Contract


# Count

{% openapi src="/files/BmmYPUEqSA3Beg9qdGD2" path="/v1/items/all/contract/count/{contractId}" method="get" %}
[api spec.json](https://2034179314-files.gitbook.io/~/files/v0/b/gitbook-x-prod.appspot.com/o/spaces%2FgQyCg5IN7Cv6AnUUpGl2%2Fuploads%2FGrUEXrexQG7EtD1fOlmc%2Fapi%20spec.json?alt=media)
{% endopenapi %}


# Payout


# Count

{% openapi src="/files/BmmYPUEqSA3Beg9qdGD2" path="/v1/items/all/payout/count/{payoutId}" method="get" %}
[api spec.json](https://2034179314-files.gitbook.io/~/files/v0/b/gitbook-x-prod.appspot.com/o/spaces%2FgQyCg5IN7Cv6AnUUpGl2%2Fuploads%2FGrUEXrexQG7EtD1fOlmc%2Fapi%20spec.json?alt=media)
{% endopenapi %}


# Assets

{% openapi src="/files/BmmYPUEqSA3Beg9qdGD2" path="/v1/assets/{id}" method="get" %}
[api spec.json](https://2034179314-files.gitbook.io/~/files/v0/b/gitbook-x-prod.appspot.com/o/spaces%2FgQyCg5IN7Cv6AnUUpGl2%2Fuploads%2FGrUEXrexQG7EtD1fOlmc%2Fapi%20spec.json?alt=media)
{% endopenapi %}

{% openapi src="/files/BmmYPUEqSA3Beg9qdGD2" path="/v1/assets" method="get" %}
[api spec.json](https://2034179314-files.gitbook.io/~/files/v0/b/gitbook-x-prod.appspot.com/o/spaces%2FgQyCg5IN7Cv6AnUUpGl2%2Fuploads%2FGrUEXrexQG7EtD1fOlmc%2Fapi%20spec.json?alt=media)
{% endopenapi %}


# Blockchain

{% openapi src="/files/BmmYPUEqSA3Beg9qdGD2" path="/v1/assets/blockchain/{blockchainId}" method="get" %}
[api spec.json](https://2034179314-files.gitbook.io/~/files/v0/b/gitbook-x-prod.appspot.com/o/spaces%2FgQyCg5IN7Cv6AnUUpGl2%2Fuploads%2FGrUEXrexQG7EtD1fOlmc%2Fapi%20spec.json?alt=media)
{% endopenapi %}


# All


# Blockchains

{% openapi src="/files/BmmYPUEqSA3Beg9qdGD2" path="/v1/assets/all/blockchains" method="get" %}
[api spec.json](https://2034179314-files.gitbook.io/~/files/v0/b/gitbook-x-prod.appspot.com/o/spaces%2FgQyCg5IN7Cv6AnUUpGl2%2Fuploads%2FGrUEXrexQG7EtD1fOlmc%2Fapi%20spec.json?alt=media)
{% endopenapi %}


# Blockchains

{% openapi src="/files/BmmYPUEqSA3Beg9qdGD2" path="/v1/blockchains/{id}" method="get" %}
[api spec.json](https://2034179314-files.gitbook.io/~/files/v0/b/gitbook-x-prod.appspot.com/o/spaces%2FgQyCg5IN7Cv6AnUUpGl2%2Fuploads%2FGrUEXrexQG7EtD1fOlmc%2Fapi%20spec.json?alt=media)
{% endopenapi %}

{% openapi src="/files/BmmYPUEqSA3Beg9qdGD2" path="/v1/blockchains" method="get" %}
[api spec.json](https://2034179314-files.gitbook.io/~/files/v0/b/gitbook-x-prod.appspot.com/o/spaces%2FgQyCg5IN7Cv6AnUUpGl2%2Fuploads%2FGrUEXrexQG7EtD1fOlmc%2Fapi%20spec.json?alt=media)
{% endopenapi %}


# Multiple

{% openapi src="/files/BmmYPUEqSA3Beg9qdGD2" path="/v1/blockchains/multiple/{ids}" method="get" %}
[api spec.json](https://2034179314-files.gitbook.io/~/files/v0/b/gitbook-x-prod.appspot.com/o/spaces%2FgQyCg5IN7Cv6AnUUpGl2%2Fuploads%2FGrUEXrexQG7EtD1fOlmc%2Fapi%20spec.json?alt=media)
{% endopenapi %}


# Native asset

{% openapi src="/files/BmmYPUEqSA3Beg9qdGD2" path="/v1/blockchains/native-asset/{id}" method="get" %}
[api spec.json](https://2034179314-files.gitbook.io/~/files/v0/b/gitbook-x-prod.appspot.com/o/spaces%2FgQyCg5IN7Cv6AnUUpGl2%2Fuploads%2FGrUEXrexQG7EtD1fOlmc%2Fapi%20spec.json?alt=media)
{% endopenapi %}


# Audit event mappings

{% openapi src="/files/BmmYPUEqSA3Beg9qdGD2" path="/v1/audit-event-mappings" method="get" %}
[api spec.json](https://2034179314-files.gitbook.io/~/files/v0/b/gitbook-x-prod.appspot.com/o/spaces%2FgQyCg5IN7Cv6AnUUpGl2%2Fuploads%2FGrUEXrexQG7EtD1fOlmc%2Fapi%20spec.json?alt=media)
{% endopenapi %}


# Platform webhooks

{% openapi src="/files/BmmYPUEqSA3Beg9qdGD2" path="/v1/platform-webhooks" method="get" %}
[api spec.json](https://2034179314-files.gitbook.io/~/files/v0/b/gitbook-x-prod.appspot.com/o/spaces%2FgQyCg5IN7Cv6AnUUpGl2%2Fuploads%2FGrUEXrexQG7EtD1fOlmc%2Fapi%20spec.json?alt=media)
{% endopenapi %}

{% openapi src="/files/BmmYPUEqSA3Beg9qdGD2" path="/v1/platform-webhooks" method="post" %}
[api spec.json](https://2034179314-files.gitbook.io/~/files/v0/b/gitbook-x-prod.appspot.com/o/spaces%2FgQyCg5IN7Cv6AnUUpGl2%2Fuploads%2FGrUEXrexQG7EtD1fOlmc%2Fapi%20spec.json?alt=media)
{% endopenapi %}

{% openapi src="/files/BmmYPUEqSA3Beg9qdGD2" path="/v1/platform-webhooks/{id}" method="put" %}
[api spec.json](https://2034179314-files.gitbook.io/~/files/v0/b/gitbook-x-prod.appspot.com/o/spaces%2FgQyCg5IN7Cv6AnUUpGl2%2Fuploads%2FGrUEXrexQG7EtD1fOlmc%2Fapi%20spec.json?alt=media)
{% endopenapi %}

{% openapi src="/files/BmmYPUEqSA3Beg9qdGD2" path="/v1/platform-webhooks/{id}" method="delete" %}
[api spec.json](https://2034179314-files.gitbook.io/~/files/v0/b/gitbook-x-prod.appspot.com/o/spaces%2FgQyCg5IN7Cv6AnUUpGl2%2Fuploads%2FGrUEXrexQG7EtD1fOlmc%2Fapi%20spec.json?alt=media)
{% endopenapi %}


# Set active

{% openapi src="/files/BmmYPUEqSA3Beg9qdGD2" path="/v1/platform-webhooks/{id}/set-active" method="post" %}
[api spec.json](https://2034179314-files.gitbook.io/~/files/v0/b/gitbook-x-prod.appspot.com/o/spaces%2FgQyCg5IN7Cv6AnUUpGl2%2Fuploads%2FGrUEXrexQG7EtD1fOlmc%2Fapi%20spec.json?alt=media)
{% endopenapi %}


# Tickets

{% openapi src="/files/BmmYPUEqSA3Beg9qdGD2" path="/v1/tickets" method="post" %}
[api spec.json](https://2034179314-files.gitbook.io/~/files/v0/b/gitbook-x-prod.appspot.com/o/spaces%2FgQyCg5IN7Cv6AnUUpGl2%2Fuploads%2FGrUEXrexQG7EtD1fOlmc%2Fapi%20spec.json?alt=media)
{% endopenapi %}


# External Integrations


# Wagmi connector

Unlock Advanced Features with Tweed’s Wagmi Connector: Simplified Integration and Enhanced Security for Web3 Developers

{% embed url="<https://github.com/paytweed/Tweed-WAGMI-Connector>" %}

Tweed’s new [Wagmi](https://wagmi.sh/) Connector makes it easier for developers using Wagmi to integrate Tweed’s [Wallet-as-a-Service](/products/waas) solution. Wagmi, a robust toolkit, empowers developers with an open source collection of React Hooks that make it easier to interact with the Ethereum blockchain. With modular APIs, automatic type safety, and comprehensive documentation, Wagmi delivers an unparalleled experience in building Ethereum applications.

The synergy between Wagmi and Tweed is a game-changer for Web3 devs building on Ethereum. Tweed helps developers open up their applications through easy and secure web2 user onboarding. With advanced, self-custodial key management, companies can open up wallets for users behind the scenes, ensuring secure and compliant user ownership and an easy onboarding process. Tweed's wallet-as-a-service SDK encrypts private keys with secrets such as Google Single Sign On, simplifying wallet recovery without the need for a 12-word seed phrase. Users can access wallets and switch devices seamlessly through straightforward login methods, and key decryption occurs locally for enhanced security.

Wagmi developers can also take advantage of Tweed’s versatile authentication, streamlining the process by enabling users to connect their MetaMask wallets or utilize WalletConnect out of the box, and eliminating the need for multiple configurations. With everything under one roof, Tweedy enhances the user experience but also simplifies the integration of Wagmi. Developers can also unlock more features and products provided by Tweed such as the NFT and  In-Platform Token Checkout, offering fiat payment methods for buyers and flexible settlement options for sellers.

To integrate, developers can view our Github and run the [Wagmi Connector example](https://github.com/paytweed/Tweed-WAGMI-Connector)


# Onramp to Crypto

This feature is currently an alpha release

{% hint style="info" %}
The `toAddress` parameter is optional because users have the option to enter the wallet address directly within the widget.
{% endhint %}

{% tabs %}
{% tab title="React" %}

```tsx
import { useWeb3 } from "@paytweed/core-react";

function DemoPage() {
  const { createOnRamp } = useWeb3();

  function handleCreateOnRamp() {
    createOnRamp({
      toAddress: "0x7f8e0B31dd7e8C12cF907225E25Ed83C649bCc62", // optional
      commodities: [{ commodity: "MATIC", network: "Amoy" }], // optional
      currencyAmount: 100, // optional
      variant: 'sandbox' //optional, live by default
    });
  }

  return (
    <>
      <button onClick={handleCreateOnRamp}>onramp</button>
    </>
  );
}

export default DemoPage;
```

{% endtab %}
{% endtabs %}


# Example Projects

#### Live examples:

* Tweed's Demo: <https://demo.paytweed.com> (Recommended)\
  Incorporates both wallet and payment products, showcases both free-minting and paid checkout with ERC20 settlement. (see also [source code](https://github.com/paytweed/demo-v2-next/))
* Tweed's Events: <https://events.paytweed.com>

  Similar to the Tweed's Demo, both wallets and payments.\
  Showcases Freeminting.
* Intel Ignite Events: <https://events.intelignite.com>\
  A project with **Intel Ignite** - showcasing user wallets, and free minting.

#### Sourcecode examples:

* Tweed Demo: [Tweed Demo Source Code](https://github.com/paytweed/demo-v2-next/) (Recommended)\
  Includes example for how to implement both Wallets and Payments products.\
  Also its live on <https://demo.paytweed.com>
* Additional Wallets and Payments integration example: <https://github.com/paytweed/waas-and-payments-nextjs-example>


# Supported Blockchains

We support the following blockchains. Contact us for new chain support!

#### If your chain is not supported, please contact us by heading to [Support](broken://pages/YqTglbfptWjc0XzS5Eel). We prioritize chain additions based on client request!

{% hint style="info" %}
For integration setup:

&#x20;   **- For Production**, please use <mark style="color:green;background-color:green;">Environment.production</mark>&#x20;

&#x20;   **- For Demo**, please use <mark style="color:orange;background-color:yellow;">Environment.demo</mark>&#x20;
{% endhint %}

<table data-card-size="large" data-view="cards"><thead><tr><th></th><th></th><th></th><th></th><th></th><th data-hidden data-card-cover data-type="files"></th></tr></thead><tbody><tr><td><strong>Arbitrum One</strong></td><td>🆔 [arbitrum]</td><td>ETH, ERC-20 standard, ERC-721 standard</td><td> <mark style="color:green;background-color:green;">🚀 Production</mark> </td><td></td><td><a href="https://2034179314-files.gitbook.io/~/files/v0/b/gitbook-x-prod.appspot.com/o/spaces%2FgQyCg5IN7Cv6AnUUpGl2%2Fuploads%2FLRxdjOyJbMcEmyz0pVMc%2Farbitrum.webp?alt=media&amp;token=3dc6941a-8456-4d8c-8d2f-0a748a1a3029">arbitrum.webp</a></td></tr><tr><td><strong>Arbitrum Sepolia Testnet</strong></td><td>🆔 [arbitrumSepolia]</td><td>ETH, ERC-20 standard, ERC-721 standard</td><td> <mark style="color:green;background-color:green;">🚀 Production</mark> </td><td> <mark style="color:orange;background-color:yellow;">🛠️ Demo</mark> </td><td><a href="https://2034179314-files.gitbook.io/~/files/v0/b/gitbook-x-prod.appspot.com/o/spaces%2FgQyCg5IN7Cv6AnUUpGl2%2Fuploads%2Fz8DS8Yredl87ukZAf1Me%2Farbitrum.webp?alt=media&amp;token=36708551-c667-4c85-bc36-5876e9092eca">arbitrum.webp</a></td></tr><tr><td><strong>Avax C-Chain</strong></td><td>🆔 [avax]</td><td>AVAX, ERC-20 standard, ERC-721 standard</td><td> <mark style="color:green;background-color:green;">🚀 Production</mark> </td><td></td><td><a href="https://2034179314-files.gitbook.io/~/files/v0/b/gitbook-x-prod.appspot.com/o/spaces%2FgQyCg5IN7Cv6AnUUpGl2%2Fuploads%2FKgLwFNKZnFAh6YhO1zbY%2Favalance.webp?alt=media&amp;token=899dc8ac-c0dd-4b34-a82e-9775b80d50ad">avalance.webp</a></td></tr><tr><td><strong>Avax Fuji Testnet</strong></td><td>🆔 [avaxFuji]</td><td>AVAX, ERC-20 standard, ERC-721 standard</td><td> <mark style="color:green;background-color:green;">🚀 Production</mark> </td><td> <mark style="color:orange;background-color:yellow;">🛠️ Demo</mark> </td><td><a href="https://2034179314-files.gitbook.io/~/files/v0/b/gitbook-x-prod.appspot.com/o/spaces%2FgQyCg5IN7Cv6AnUUpGl2%2Fuploads%2FA4C5eL2H5BoeU5sTTo03%2Favalance.webp?alt=media&amp;token=cfb31421-6d1d-41ef-815d-4f3f1f5cb911">avalance.webp</a></td></tr><tr><td><strong>Beam</strong></td><td>🆔 [beam]</td><td>BEAM, ERC-20 standard, ERC-721 standard</td><td> <mark style="color:green;background-color:green;">🚀 Production</mark> </td><td></td><td><a href="https://2034179314-files.gitbook.io/~/files/v0/b/gitbook-x-prod.appspot.com/o/spaces%2FgQyCg5IN7Cv6AnUUpGl2%2Fuploads%2FfkWLJmQgoWqM38Sb5qHx%2FScreenshot%202024-07-14%20at%2016.03.50.png?alt=media&amp;token=f215b0ec-2298-4253-bb92-921f6e79e764">Screenshot 2024-07-14 at 16.03.50.png</a></td></tr><tr><td><strong>Beam Testnet</strong></td><td>🆔 [beamTestnet]</td><td>BEAM, ERC-20 standard, ERC-721 standard</td><td> <mark style="color:green;background-color:green;">🚀 Production</mark> </td><td> <mark style="color:orange;background-color:yellow;">🛠️ Demo</mark> </td><td><a href="https://2034179314-files.gitbook.io/~/files/v0/b/gitbook-x-prod.appspot.com/o/spaces%2FgQyCg5IN7Cv6AnUUpGl2%2Fuploads%2FEra4Wypnw7p3YgLy0nsy%2FScreenshot%202024-07-14%20at%2016.03.50.png?alt=media&amp;token=7a402bc5-1771-472f-9ee1-aa505e1ddbbd">Screenshot 2024-07-14 at 16.03.50.png</a></td></tr><tr><td><strong>BNB</strong></td><td>🆔 [bnbMainnet]</td><td>BNB, ERC-20 standard, ERC-721 standard</td><td> <mark style="color:green;background-color:green;">🚀 Production</mark> </td><td></td><td><a href="https://2034179314-files.gitbook.io/~/files/v0/b/gitbook-x-prod.appspot.com/o/spaces%2FgQyCg5IN7Cv6AnUUpGl2%2Fuploads%2F0I2DnyUERAxqqYdKuaPQ%2FBinance-Smart-Chain-scaled.jpeg?alt=media&amp;token=77030872-d48a-49e4-bc2e-c5a334b8b0ec">Binance-Smart-Chain-scaled.jpeg</a></td></tr><tr><td><strong>BNB Testnet</strong></td><td>🆔 [bnbTestnet]</td><td>BNB, ERC-20 standard, ERC-721 standard</td><td> <mark style="color:green;background-color:green;">🚀 Production</mark> </td><td> <mark style="color:orange;background-color:yellow;">🛠️ Demo</mark> </td><td><a href="https://2034179314-files.gitbook.io/~/files/v0/b/gitbook-x-prod.appspot.com/o/spaces%2FgQyCg5IN7Cv6AnUUpGl2%2Fuploads%2FRbJrylYC5kqfhzHgsftx%2FBinance-Smart-Chain-scaled.jpeg?alt=media&amp;token=96107911-8493-41c9-be3e-2227eb680ae1">Binance-Smart-Chain-scaled.jpeg</a></td></tr><tr><td><strong>Ethereum</strong></td><td>🆔 [ethereum]</td><td>ETH, ERC-20 standard, ERC-721 standard</td><td> <mark style="color:green;background-color:green;">🚀 Production</mark> </td><td></td><td><a href="https://2034179314-files.gitbook.io/~/files/v0/b/gitbook-x-prod.appspot.com/o/spaces%2FgQyCg5IN7Cv6AnUUpGl2%2Fuploads%2FebvMD0TTq96YN5cSGJGK%2FEthereum-Portrait-Purple-Dark-Dark-Background-Logo.wine.svg?alt=media&amp;token=32f996c0-7c22-466e-8f7a-cb781e9251b0">Ethereum-Portrait-Purple-Dark-Dark-Background-Logo.wine.svg</a></td></tr><tr><td><strong>Ethereum Sepolia Testnet</strong></td><td>🆔 [ethereumSepolia]</td><td>ETH, ERC-20 standard, ERC-721 standard</td><td> <mark style="color:green;background-color:green;">🚀 Production</mark> </td><td> <mark style="color:orange;background-color:yellow;">🛠️ Demo</mark> </td><td><a href="https://2034179314-files.gitbook.io/~/files/v0/b/gitbook-x-prod.appspot.com/o/spaces%2FgQyCg5IN7Cv6AnUUpGl2%2Fuploads%2Frn9nqqd0Y2ucd3aNFX3O%2FEthereum-Portrait-Purple-Dark-Dark-Background-Logo.wine.svg?alt=media&amp;token=c328591a-0712-4459-bd21-4666812f480b">Ethereum-Portrait-Purple-Dark-Dark-Background-Logo.wine.svg</a></td></tr><tr><td><strong>Fantom</strong></td><td>🆔 [fantom]</td><td>FTM, ERC-20 standard, ERC-721 standard</td><td> <mark style="color:green;background-color:green;">🚀 Production</mark> </td><td></td><td><a href="https://2034179314-files.gitbook.io/~/files/v0/b/gitbook-x-prod.appspot.com/o/spaces%2FgQyCg5IN7Cv6AnUUpGl2%2Fuploads%2FWhW84CLsC8fJzpYxcJra%2Ffantom-9.png?alt=media&amp;token=ae2ef504-293e-46f6-869d-3e16d2403ac6">fantom-9.png</a></td></tr><tr><td><strong>Fantom Testnet</strong></td><td>🆔 [fantomTestnet]</td><td>FTM, ERC-20 standard, ERC-721 standard</td><td> <mark style="color:green;background-color:green;">🚀 Production</mark> </td><td> <mark style="color:orange;background-color:yellow;">🛠️ Demo</mark> </td><td><a href="https://2034179314-files.gitbook.io/~/files/v0/b/gitbook-x-prod.appspot.com/o/spaces%2FgQyCg5IN7Cv6AnUUpGl2%2Fuploads%2Fe9mxhQb1UxGjOF3c58ZA%2Ffantom-9.png?alt=media&amp;token=bed6d411-321d-485f-8888-055a7fa0e8ca">fantom-9.png</a></td></tr><tr><td><strong>Fuse</strong></td><td>🆔 [fuse]</td><td>FUSE, ERC-20 standard, ERC-721 standard</td><td> <mark style="color:green;background-color:green;">🚀 Production</mark> </td><td></td><td><a href="https://2034179314-files.gitbook.io/~/files/v0/b/gitbook-x-prod.appspot.com/o/spaces%2FgQyCg5IN7Cv6AnUUpGl2%2Fuploads%2FIgaaqP8UmlFPAxj7RS1z%2Ffuse1.svg?alt=media&amp;token=f97711ed-5454-4433-95a1-9cc76eaa49c0">fuse1.svg</a></td></tr><tr><td><strong>Fuse Spark Testnet</strong></td><td>🆔 [fuseSpark]</td><td>FUSE, ERC-20 standard, ERC-721 standard</td><td> <mark style="color:green;background-color:green;">🚀 Production</mark> </td><td> <mark style="color:orange;background-color:yellow;">🛠️ Demo</mark> </td><td><a href="https://2034179314-files.gitbook.io/~/files/v0/b/gitbook-x-prod.appspot.com/o/spaces%2FgQyCg5IN7Cv6AnUUpGl2%2Fuploads%2FYlJypUeGEItDVlTaoN69%2Ffuse1.svg?alt=media&amp;token=8da910f4-092d-448b-bd69-ca75bb3643d5">fuse1.svg</a></td></tr><tr><td><strong>Polygon</strong></td><td>🆔 [polygon]</td><td>ETH, ERC-20 standard, ERC-721 standard</td><td> <mark style="color:green;background-color:green;">🚀 Production</mark> </td><td></td><td><a href="https://2034179314-files.gitbook.io/~/files/v0/b/gitbook-x-prod.appspot.com/o/spaces%2FgQyCg5IN7Cv6AnUUpGl2%2Fuploads%2FAGhJsnWg3AfxWFDA3SHN%2Fpolygon.png?alt=media&amp;token=1b0f0c93-f797-4020-9f81-92aeadaf5568">polygon.png</a></td></tr><tr><td><strong>Polygon Mumbai Testnet</strong></td><td>🆔 [polygonMumbai]</td><td>ETH, ERC-20 standard, ERC-721 standard</td><td> <mark style="color:green;background-color:green;">🚀 Production</mark> </td><td> <mark style="color:orange;background-color:yellow;">🛠️ Demo</mark> </td><td><a href="https://2034179314-files.gitbook.io/~/files/v0/b/gitbook-x-prod.appspot.com/o/spaces%2FgQyCg5IN7Cv6AnUUpGl2%2Fuploads%2Fw9ryWqFGS947QpGup6JE%2Fpolygon.png?alt=media&amp;token=901a0936-d4fe-4ec4-b6a0-278d7982d4d5">polygon.png</a></td></tr><tr><td><strong>Solana</strong></td><td>🆔 [solana]</td><td>SOL<br>SPL-TOKEN</td><td> <mark style="color:green;background-color:green;">🚀 Production</mark> </td><td></td><td><a href="https://2034179314-files.gitbook.io/~/files/v0/b/gitbook-x-prod.appspot.com/o/spaces%2FgQyCg5IN7Cv6AnUUpGl2%2Fuploads%2F6bdgDryawYPLa0dweOtw%2Fsolana.png?alt=media&amp;token=56497246-fee1-4620-9264-36c4d81e9057">solana.png</a></td></tr><tr><td><strong>Solana Devnet</strong></td><td>🆔 [solanaDevnet]</td><td><p>SOL </p><p>SPL-TOKEN</p><p> <mark style="color:green;background-color:green;">🚀 Production</mark> </p></td><td> <mark style="color:orange;background-color:yellow;">🛠️ Demo</mark> </td><td></td><td><a href="https://2034179314-files.gitbook.io/~/files/v0/b/gitbook-x-prod.appspot.com/o/spaces%2FgQyCg5IN7Cv6AnUUpGl2%2Fuploads%2FXCm3o21k0rqbBAeaZfDd%2Fsolana.png?alt=media&amp;token=2bf595c2-459d-4287-9073-82ec52b05bf1">solana.png</a></td></tr><tr><td><strong>Tezos</strong></td><td>🆔 [tezos]</td><td>XTZ, FA1.2 (TZIP-7) standard, FA2 (TZIP-12)  standard</td><td> <mark style="color:green;background-color:green;">🚀 Production</mark> </td><td></td><td><a href="https://2034179314-files.gitbook.io/~/files/v0/b/gitbook-x-prod.appspot.com/o/spaces%2FgQyCg5IN7Cv6AnUUpGl2%2Fuploads%2FrqmqrOmcHRLm20M5hmvw%2Ftezos-upgrade-h.jpg?alt=media&amp;token=51e01faa-1d74-4c2d-b18c-770240ead961">tezos-upgrade-h.jpg</a></td></tr><tr><td><strong>Tezos Ghost Testnet</strong></td><td>🆔 [tezosGhost]</td><td>XTZ, FA1.2 (TZIP-7) standard, FA2 (TZIP-12)  standard</td><td> <mark style="color:green;background-color:green;">🚀 Production</mark> </td><td> <mark style="color:orange;background-color:yellow;">🛠️ Demo</mark> </td><td><a href="https://2034179314-files.gitbook.io/~/files/v0/b/gitbook-x-prod.appspot.com/o/spaces%2FgQyCg5IN7Cv6AnUUpGl2%2Fuploads%2FUQ7VkyVC9hPekfeRGy1J%2Ftezos-upgrade-h.jpg?alt=media&amp;token=87a20b27-566f-459e-bde8-094da2dbfa66">tezos-upgrade-h.jpg</a></td></tr><tr><td><strong>Base</strong></td><td>🆔 [ethereum]</td><td>ETH, ERC-20 standard, ERC-721 standard</td><td> <mark style="color:green;background-color:green;">🚀 Production</mark> </td><td></td><td><a href="https://2034179314-files.gitbook.io/~/files/v0/b/gitbook-x-prod.appspot.com/o/spaces%2FgQyCg5IN7Cv6AnUUpGl2%2Fuploads%2FGRoMBqswnVJDp14FdWci%2Fbase.png?alt=media&amp;token=e20db917-ed13-4045-97d1-ed5017a4e82c">base.png</a></td></tr><tr><td><strong>Base Sepolia</strong></td><td>🆔 [ethereumSepolia]</td><td>ETH, ERC-20 standard, ERC-721 standard</td><td> <mark style="color:green;background-color:green;">🚀 Production</mark> </td><td> <mark style="color:orange;background-color:yellow;">🛠️ Demo</mark> </td><td><a href="https://2034179314-files.gitbook.io/~/files/v0/b/gitbook-x-prod.appspot.com/o/spaces%2FgQyCg5IN7Cv6AnUUpGl2%2Fuploads%2FGRoMBqswnVJDp14FdWci%2Fbase.png?alt=media&amp;token=e20db917-ed13-4045-97d1-ed5017a4e82c">base.png</a></td></tr><tr><td><strong>Linea</strong></td><td>🆔 [Linea]</td><td>Linea, ERC-20 standard, ERC-721 standard</td><td> <mark style="color:green;background-color:green;">🚀 Production</mark> </td><td></td><td><a href="https://2034179314-files.gitbook.io/~/files/v0/b/gitbook-x-prod.appspot.com/o/spaces%2FgQyCg5IN7Cv6AnUUpGl2%2Fuploads%2FYNJrbQrvBlsEXCvQlvgs%2FLinea-scaled.jpg?alt=media&amp;token=7a6e639d-5f19-49f5-b495-7eef64f2f996">Linea-scaled.jpg</a></td></tr><tr><td><strong>Linea Goerli</strong></td><td>🆔 [Linea Goerli]</td><td>Linea, ERC-20 standard, ERC-721 standard</td><td><mark style="color:green;background-color:green;">🚀 Production</mark> </td><td><mark style="color:orange;background-color:yellow;">🛠️ Demo</mark> </td><td><a href="https://2034179314-files.gitbook.io/~/files/v0/b/gitbook-x-prod.appspot.com/o/spaces%2FgQyCg5IN7Cv6AnUUpGl2%2Fuploads%2Fh8YXch4GP8jTofpGPfyi%2FLinea-scaled.jpg?alt=media&amp;token=88c03471-3fed-4746-a8a1-dc72c5453eea">Linea-scaled.jpg</a></td></tr></tbody></table>


# Pricing

Find our fees for Wallet as a Service and NFT & Token Checkout below

## Wallet as a Service

Tweed charges monthly, tiered fees based on Monthly Active Wallets. The more active wallets a platform has, the cheaper the service is on a per wallet basis.

An active wallet is defined as a wallet for which an API call is made within a given month. An active wallet can have an unlimited number of API calls per month.&#x20;

[Contact us](broken://pages/YqTglbfptWjc0XzS5Eel#send-us-a-message) for exact pricing details.

***

## NFT & In-Platform Token Checkout

{% hint style="info" %}
[**NFT & Token Checkout**](broken://pages/YWKjxYdhifBLxt3krGi2) **is free for platforms**. Buyers are charged the fees below.
{% endhint %}

The processing fee is calculated using the following formula:\
fee = (NFT\_PRICE \* 0.049) + 30c$ + CHAIN\_GAS\_FEE\
This fee is included in the total NFT price presented to the buyer before they confirm the transaction. \
An extra fee of 1.5% processing fee will be added for international cards (non US).

Gas fees are determined by the chain selection and can vary.


# WaaS

Elevate Your Platform with Tweed's Revolutionary Wallet-as-a-Service

<figure><img src="https://2034179314-files.gitbook.io/~/files/v0/b/gitbook-x-prod.appspot.com/o/spaces%2FgQyCg5IN7Cv6AnUUpGl2%2Fuploads%2FL1kPZqmDzc2HJWORp9DA%2Fwallet-as-a-service.png?alt=media&amp;token=9dfd1135-98c1-4a9e-a49c-8473250c0231" alt="wallet-as-a-service mobile screenshots"><figcaption></figcaption></figure>

> Related Guides
>
> [Embedded Wallets | WaaS](/getting-started/embedded-wallets-or-waas)

Discover the ultimate Wallet-as-a-Service solution with Tweed, designed to seamlessly integrate cutting-edge Web3 functionality into your Web2 applications. Our platform empowers developers with a secure, user-friendly self-custodial wallet system that simplifies onboarding and ensures unparalleled security and compliance.

**Self-Custody, Ultimate Security**

With Tweed, users hold the keys—literally. Our self-custody wallet ensures only the user has access to their private key, safeguarding their assets from unauthorized access by any third party, including Tweed itself. Experience peace of mind with maximum security and privacy.

**Effortless and Secure Access**

Tweed enhances security and user convenience with Google login integration. Users can easily access their wallets with their Google credentials, combining simplicity with robust security.

**Seamless Integration for Developers**

Say goodbye to the hassle of juggling multiple providers. Tweed’s WaaS comes integrated with our comprehensive authentication solution, offering developers a streamlined way to incorporate Web3 functionalities into their apps. Focus on innovation while we handle authentication and wallet management.

**EVM Provider Compliance**

Our Ethereum Virtual Machine (EVM) provider is EIP-1193 compliant, ensuring smooth integration with popular Web3 tools like wagmi and EthersJS. Tweed simplifies the process of connecting your dApps, making development faster and more efficient.

**Simplified Onboarding for Web2 Users**

Tweed revolutionizes the onboarding process by embedding wallet creation directly into your platform. This makes it easy for Web2 users to start their Web3 journey without prior knowledge of blockchain technology, enhancing user engagement and retention.

**White Label Customization**

Tailor your platform’s experience with Tweed’s fully white-label and customizable WaaS solution. Maintain complete control over the user interface and user journey while ensuring global compliance from day one with our 100% self-custodial key management.


# Payments

Fungible and Non Fungible

<figure><img src="https://2034179314-files.gitbook.io/~/files/v0/b/gitbook-x-prod.appspot.com/o/spaces%2FgQyCg5IN7Cv6AnUUpGl2%2Fuploads%2F0I1CbFsXljH865YviZRs%2Ftoken%20-checkout.png?alt=media&amp;token=b1f13b24-d10b-4d3a-bdd3-1f225fdc1f70" alt="token checkout screenshots"><figcaption></figcaption></figure>

With Tweed's Token Checkout, your platform can sell tokens (both fungible and non-fungible) without requiring users to be familiar with Web3, blockchain or crypto technology - or even own cryptocurrency. Instead, you can offer buyers a familiar e-commerce experience and let them pay with fiat currencies. Consumers can pay with their credit or debit card, or Apple Pay or Google Pay - Tweed handles the rest.&#x20;

Tweed's proprietary [smart contracts](broken://pages/M12AxnREkXqlQzD2gKPK) ensure tokens are minted and sent to the right wallet address. With multiple admin wallets connected to the smart contract, your collection is never at risk. \
Customers will always get their assets and you will always get paid - as simple as that.

Pair it with our [Wallet as a Service](broken://pages/hImckOkj3LtszADKlAZ7) solution and users don't even need a crypto wallet to purchase tokens or NFTs. Gone are the days of purchasing crypto, going through KYC, and understanding gas fees!

The token checkout can be initiated from the frontend ([Interactive Token Checkout](broken://pages/WigGetNDvQadmdvZ0FDc)) or from the backend ([Payment link](broken://pages/R6cybGfaCosMO5rs0SKc)).

***

The In-Platform Token Checkout feature allows platforms to sell fungible In-Platform tokens such as loyalty points, in-game currency, or other tokens that can be used for redeeming status, membership, playable characters, or other digital or physical platform merchandise.&#x20;

🌟 Instant, Seamless Purchases: users can buy in-platform tokens instantly with credit/debit card, bypassing the hassle of purchasing crypto.

&#x20;💻 Developer Friendly: integrate quickly - Tweed’s In-Platform Token Checkout is simple and free for developers to incorporate into their platform.&#x20;

🔄 Flexible, E2E Solution: flexible settlement with either crypto or fiat. When combined with our Wallet as a Service solution, platforms can offer a truly end-to-end experience for users.

***

Continue to our [Payments Integration Guide](/getting-started/token-checkout-or-payments)